Hydro-Jetting in Helotes, TX

What Is Hydro Jetting? How It Works, Costs Avoided, and Pipe Safety Guide

Hydro jetting uses 1,500 to 4,000 PSI water through a specialized nozzle to scour grease, sludge, mineral scale, tree roots, and biofilm from inside drain and sewer pipes. The pressurized water flow restores full pipe diameter and clears blockages that drain snakes, chemical cleaners, and rodding equipment leave behind.

Homeowners and commercial property owners search for hydro jetting after recurring clogs, slow drains, sewer backups, or gurgling fixtures fail to clear with simpler methods. The decision matters because hydro jetting reaches deep buildup that snaking cannot, but the high water pressure also requires careful calibration on aging pipes.

This guide explains what hydro jetting does, how the process works step by step, what PSI and equipment specifications matter, which pipe materials handle high-pressure cleaning safely, and when hydro jetting is the wrong choice. San Antonio plumbing conditions add specific factors covered in the local section.

Key Takeaways

  • Hydro jetting delivers 1,500 to 4,000 PSI water at 6 to 18 gallons per minute through forward-cutting and rotating nozzles to remove buildup from sewer lines and drain pipes.
  • Hydro jetting outperforms drain snaking on grease, mineral scale, and accumulated biofilm because the pressurized water scours pipe walls rather than punching a hole through the clog.
  • Pre-jetting CCTV camera inspection confirms pipe material and joint integrity before PSI is calibrated. Cast iron, clay, Orangeburg, and galvanized steel pipes require lower pressure or alternative cleaning methods.
  • Residential hydro jetting results last 2 to 4 years. Commercial grease lines and restaurant kitchens require service every 6 to 12 months because cooking oil accumulation rebuilds faster.
  • Anchor Plumbing Services performs hydro jetting under Master Plumber Gerald S. Cortez (Texas License #41829) with pre-jetting camera inspection, calibrated PSI by pipe material, and a flat-rate written quote before work starts.

What Is Hydro Jetting?

Hydro jetting is a high-pressure water cleaning method that plumbers use to clear sewer lines, drain pipes, and septic system lines. A jetter unit pressurizes water to between 1,500 and 4,000 PSI and pushes it through a flexible hose ending in a specialized nozzle. The nozzle directs water streams forward to cut through blockages and backward or sideways to scour the pipe walls clean.

Hydro jetting removes grease deposits, soap scum, mineral scale, tree root masses, food sludge, paper buildup, and biofilm that line the inside of plumbing pipes. The water flow carries the loosened debris downstream into the city sewer main or septic tank. Drain snakes punch a hole through clogs but leave the surrounding buildup in place, which causes the clog to return within months. Hydro jetting strips the buildup completely and restores full pipe diameter.

Plumbers also call hydro jetting water jetting, sewer jetting, hydrojetting, or high-pressure water jetting. The technique applies to residential drain lines, main sewer lines, commercial grease traps, restaurant kitchen drains, and septic lateral lines. Each application uses different PSI and nozzle configurations matched to the pipe diameter and the type of buildup.

How Does Hydro Jetting Work?

A licensed plumber performs hydro jetting in six steps that combine diagnostic inspection, equipment calibration, and verification.

  1. Inspect the pipe with a CCTV camera. A waterproof camera on a fiberglass push rod travels the length of the pipe to identify the buildup type, pipe material, joint condition, and any cracks or root intrusion. The footage confirms whether hydro jetting is safe at the chosen PSI.
  2. Locate the cleanout access. The plumber identifies the closest exterior cleanout, basement cleanout, or roof vent that provides direct access to the pipe section that needs cleaning. The cleanout determines how far the jetter hose reaches.
  3. Calibrate the PSI for pipe material and clog type. PVC and modern cast iron tolerate the full 4,000 PSI range. Older cast iron, clay, and galvanized pipes require lower pressure between 1,500 and 2,500 PSI to prevent joint damage.
  4. Select the right nozzle. A forward-cutting nozzle breaks through hard blockages. A rotating nozzle scours pipe walls in a 360-degree pattern. A chisel nozzle cuts hardened mineral scale and ice. A root-cutter nozzle slices fibrous tree roots.
  5. Run the jetting cycle. The plumber feeds the hose into the pipe and pushes water through the nozzle. The forward jets cut into the blockage while the backward jets pull the hose deeper and scour the pipe walls behind it. The process continues until the pipe runs clear.
  6. Verify with a final camera pass. A second CCTV inspection confirms the pipe is fully cleared, documents the restored interior condition, and identifies any underlying damage that the buildup was hiding.

The verification step matters because hidden cracks or partial collapses sometimes appear only after buildup is removed. A sewer camera inspection before pipe repair documents the pipe’s true condition and supports any follow-up repair decisions.

What PSI and Equipment Does Hydro Jetting Use?

Hydro jetting equipment combines a water tank, a high-pressure pump, a reinforced hose, and an interchangeable nozzle. The PSI rating, flow rate in gallons per minute, and nozzle configuration determine how the system performs against different pipe diameters and buildup types.

Pressure ratings by application

  • Residential drain lines: 1,500 to 2,500 PSI at 4 to 8 GPM. The lower end protects 2-inch and 3-inch interior drain lines while still scouring grease and soap scum.
  • Main sewer lines: 2,500 to 3,500 PSI at 8 to 12 GPM. Higher flow rates move debris through 4-inch and 6-inch sewer pipes more efficiently.
  • Commercial and municipal lines: 3,500 to 4,000 PSI at 12 to 18 GPM. The full pressure range handles 8-inch and larger lines, restaurant grease traps, and industrial drainage.

Nozzle types and their use cases

  • Forward-cutting nozzle: Concentrates water flow forward to break through solid blockages. Plumbers use it as the first nozzle when a complete obstruction blocks pipe access.
  • Rotating nozzle: Spins as water flows through angled ports to scour the full 360-degree pipe wall. Removes grease film, soap scum, and mineral scale layered around the inside of the pipe.
  • Chisel nozzle: Delivers a concentrated forward jet that cuts hardened scale, ice plugs, and compacted debris in older cast iron lines.
  • Root-cutter nozzle: Combines forward water jets with mechanical cutting blades to slice through fibrous root masses entering the pipe at joints.
  • Penetrator nozzle: A narrow forward jet with minimal rear flow for clearing tight 1.5-inch and 2-inch fixture drains without overpressurizing the line.

Jetter units come in three configurations. A portable cart-mounted jetter handles residential calls and reaches up to 200 feet. A trailer-mounted jetter combines a larger water tank with higher PSI for main sewer work. A truck-mounted jetter integrates a 300 to 1,500-gallon water tank for commercial routes and municipal contracts.

What Is the Difference Between Hydro Jetting and Drain Snaking?

Hydro jetting cleans the entire interior pipe wall using pressurized water flow. Drain snaking pushes a metal cable through the clog to break a path for water to flow again. The two methods solve different problems.

Factor Hydro Jetting Drain Snaking
Cleaning method Pressurized water scours pipe walls Metal cable punches through the clog
Best for Grease, mineral scale, biofilm, soap scum, accumulated sludge, root masses Hair clogs, small object obstructions, soft food blockages
Cleaning depth Full pipe interior diameter restored Narrow channel cut through the clog only
Long-term results 2 to 4 years residential, 6 to 12 months commercial grease lines Months to a year before the clog returns
Pipe size range 1.5 inch to 12 inch and larger 1.25 inch to 4 inch typically
Pre-inspection required Yes, CCTV camera confirms pipe condition No, plumber feeds the cable directly into the line
Risk to old pipes Higher risk on corroded or brittle pipes without calibration Lower risk because cable force is contained inside the cable path


Drain snaking solves an isolated clog faster and costs less for a single fixture problem. Hydro jetting solves recurring clogs, sewer line blockages, and commercial grease problems where the buildup extends across the entire pipe interior. Plumbers often run both: snake first to clear the immediate blockage, then jet the line to remove the surrounding buildup that caused the clog.

When Should You Use Hydro Jetting?

Hydro jetting fits situations where buildup extends along the pipe interior rather than a single isolated obstruction. Common signs and application scenarios point to when the service makes sense.

Signs you need hydro jetting

  • Recurring clogs at the same fixture within weeks of clearing. The pattern indicates grease, soap scum, or mineral scale rebuilding faster than snaking removes it.
  • Multiple drains slow down at the same time. Simultaneous slow drainage signals a buildup or blockage in the main sewer line that serves the entire house.
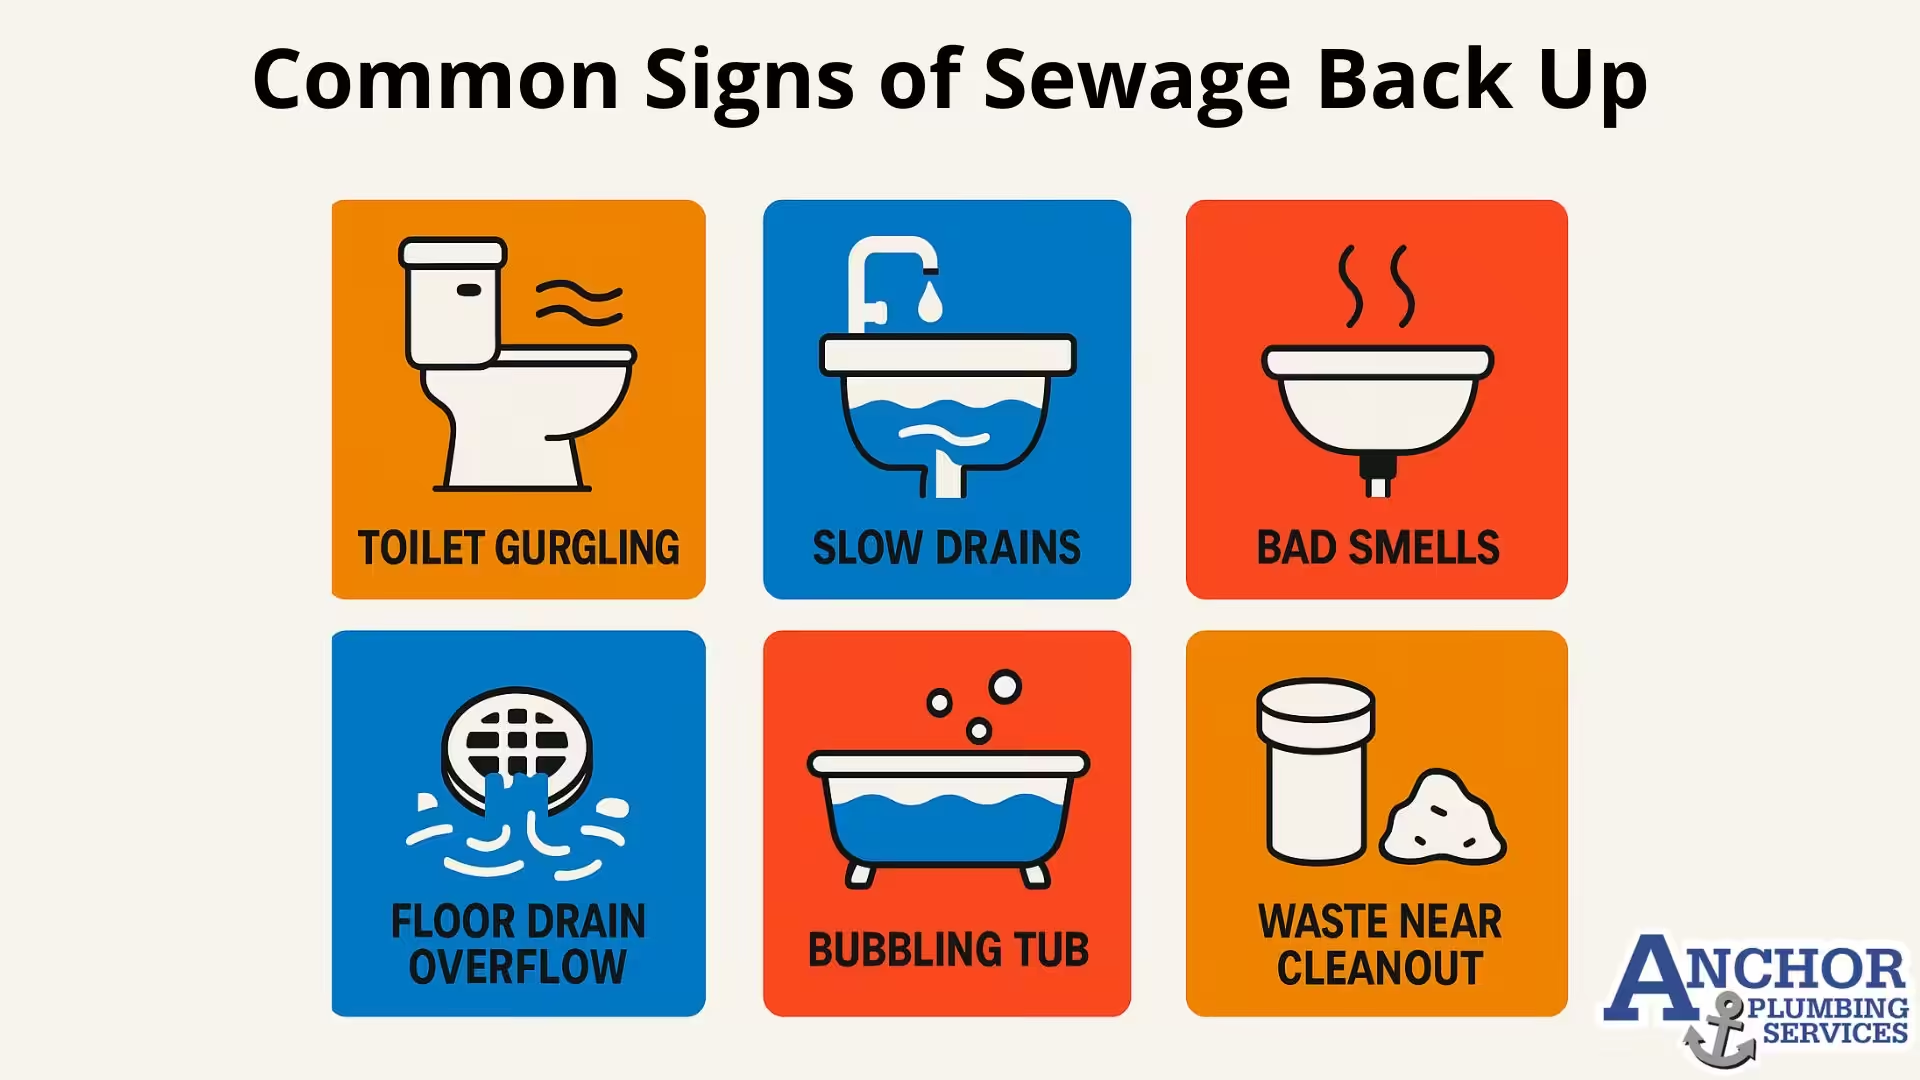
  • Gurgling toilets or tub drains during normal water use. Air pockets trapped behind partial blockages release as gurgling when water tries to pass.
  • Sewer odors from floor drains or cleanouts. Odors point to buildup that traps sewer gases inside the line.
  • Toilets backing up into showers or tubs. Cross-fixture backup signals a main sewer line restriction that needs full-pipe cleaning.
  • Tree root masses confirmed on a sewer camera inspection. Hydro jetting with a root-cutter nozzle clears the existing intrusion, though regrowth returns over time.

Residential drain and sewer line application

Single-family homes use hydro jetting on kitchen drains, bathroom drains, laundry standpipes, floor drains, and the main sewer line connecting the house to the city sewer. Kitchen drains benefit most because cooking grease coats the pipe interior gradually and snaking only opens a temporary channel through it.

Main sewer line application

The main sewer line runs from the house cleanout to the city sewer connection at the street. Hydro jetting clears tree root infiltration at pipe joints, removes years of accumulated debris, and restores full flow capacity. A pre-jetting camera inspection identifies whether the pipe condition supports high-pressure cleaning or requires repair first.

Septic system and drain field application

Septic systems use lateral lines that distribute effluent from the septic tank into the drain field. Biological mat buildup, root infiltration at lateral pipe joints, and sediment accumulation reduce drain field absorption over time. Hydro jetting at calibrated lower PSI (1,500 to 2,200) clears lateral lines without damaging the perforated distribution pipe.

Commercial and restaurant kitchen application

Restaurant kitchens generate fats, oils, and grease (FOG) that solidify inside drain lines and grease trap connections. Hydro jetting cycles run monthly to quarterly to keep grease lines clear and prevent code violations. Commercial property managers schedule hydro jetting as preventive maintenance rather than reactive cleaning.

What Pipe Materials Are Safe for Hydro Jetting?

Pipe material determines the safe PSI ceiling for hydro jetting. Pre-jetting CCTV inspection confirms the material and the condition of the joints, because aging and corrosion reduce the pressure a pipe tolerates.

Pipe Material Safe PSI Range Common In Caution
PVC Up to 4,000 PSI Homes built after 1980 None when joints are intact
ABS Up to 4,000 PSI Drain, waste, and vent lines None when joints are intact
Copper Up to 4,000 PSI Water supply lines (not common for sewer) Check for thinning before high PSI
Modern cast iron 3,000 to 4,000 PSI Post-1980 commercial buildings Reduce pressure if corrosion is visible
Older cast iron 1,500 to 2,500 PSI Pre-1980 homes including most central San Antonio Joint corrosion limits safe pressure
Clay tile 1,500 to 2,000 PSI Older municipal sewer connections Joints crack under high pressure
Orangeburg Not recommended Homes built 1945 to 1972 Tar-impregnated wood fiber. Replace instead.
Galvanized steel Not recommended Homes built before 1960 Internal corrosion creates brittle walls


Pre-jetting camera inspection confirms three things before pressure is applied: the pipe material, the joint condition, and the location of any cracks or partial collapses. Hydro jetting a compromised pipe risks blowing out joints, fracturing the pipe wall, or pushing wastewater into surrounding soil. When the inspection reveals structural damage, repair or trenchless lining replaces hydro jetting as the correct service.

How Effective Is Hydro Jetting Against Tree Roots?

Hydro jetting cuts fibrous tree roots inside sewer pipes using a root-cutter nozzle that combines high-pressure water jets with mechanical cutting blades. The water flow carries the cut root fragments downstream into the city sewer. A standard cleaning cycle removes the visible root mass and restores full pipe flow.

Hydro jetting does not kill the source tree. Roots grow back through the same pipe joint within 6 to 24 months because the tree continues drawing water from the soil moisture around the pipe. Long-term root control requires either replacing the affected pipe section, lining the pipe with cured-in-place pipe (CIPP), or applying a root-inhibiting foam treatment annually.

San Antonio neighborhoods with mature live oak and pecan trees see the highest rate of sewer root intrusion. Live oak root systems extend 2 to 3 times the canopy radius and aggressively seek moisture along underground pipe lines. Pecan roots concentrate near the soil surface but extend deep along irrigation paths. Pre-1980 homes with cast iron sewer mains in expansive clay soil experience seasonal pipe shifting that opens joints to root entry. Hydro jetting clears the immediate blockage while a sewer camera inspection documents whether replacement or lining is the next step.

How Long Does Hydro Jetting Last and How Often Should You Schedule It?

Residential hydro jetting results last 2 to 4 years for typical kitchen and main sewer line applications. Commercial grease lines and restaurant kitchen drains require service every 6 to 12 months because cooking oil accumulation rebuilds faster than residential drain debris.

Schedule recommendations adjust to household type, pipe age, and use patterns:

  • Single-family residential, post-1980 PVC pipes: Hydro jet every 3 to 4 years as preventive maintenance, or after the second recurring clog within 6 months.
  • Single-family residential, pre-1980 cast iron pipes: Schedule every 18 to 30 months because corrosion and joint shifting accelerate buildup.
  • Homes with mature trees within 20 feet of the sewer line: Annual hydro jetting prevents root intrusion from reaching the main sewer line.
  • Restaurant kitchens and commercial food service: Quarterly hydro jetting prevents grease accumulation that causes code violations and backups.
  • Multi-family residential properties: Annual main sewer line jetting prevents shared-line backups across multiple units.

Cost varies by pipe length, access point, and pre-inspection findings. The hydro jetting cost breakdown for San Antonio homes covers pricing ranges, what’s included in a flat-rate quote, and how camera inspection results affect the final cost.

What Are the Risks and Limitations of Hydro Jetting?

Hydro jetting carries specific risks when applied to the wrong pipe or condition. A plumber who skips the pre-jetting camera inspection or runs full PSI on a compromised line creates problems the original blockage did not cause.

When hydro jetting is the wrong choice

  • Collapsed pipes or severe sagging. High-pressure water exits through the failure point and pushes wastewater into the soil under the home.
  • Cracked or fractured cast iron with visible wall thinning. The pressure widens the existing crack and accelerates the pipe failure.
  • Orangeburg pipe in pre-1972 homes. The tar-impregnated wood fiber material disintegrates under hydro jetting pressure. Pipe replacement is the correct service.
  • Severely corroded galvanized steel drain lines. Internal rust scale flakes off under pressure and creates new downstream blockages.
  • Pipes with active sewage backflow. Hydro jetting pushes contaminated water back toward fixture drains and creates a health hazard inside the home.

Risks of incorrect application

  • Pipe joint blowout. Excess PSI separates connected pipe sections at the joint, requiring excavation and repair.
  • Backsplash through floor drains and toilets. A plumber working without proper containment can push wastewater up into the home.
  • Sewer gas release. Pressurizing a sewer line forces hydrogen sulfide and methane up through dry traps and vent openings.
  • Damage to septic distribution boxes and drain field laterals. Over-pressurized water dislodges gravel beds and disrupts the absorption field.

When the pre-jetting inspection reveals structural damage, the correct service shifts to spot repair, trenchless cured-in-place pipe lining, or full pipe replacement. Hydro jetting cleans pipes, it does not repair them.

How Does San Antonio Plumbing Affect Hydro Jetting Strategy?

San Antonio water carries 15 to 20 grains per gallon hardness according to the San Antonio Water System¹. The mineral content settles inside sewer mains, kitchen drains, and washing machine standpipes faster than soft-water cities. Hard water scale combined with grease and soap residue forms a thick interior coating that snaking only chips away at.

Edwards Aquifer water creates the same mineral buildup inside water heaters and dishwashers that it creates inside sewer mains. The accelerated scale formation explains why San Antonio homes need hydro jetting more frequently than national average recommendations suggest.

The local soil profile adds two more factors. Expansive clay soil under most San Antonio neighborhoods shifts seasonally with rainfall and drought cycles. The shifting opens pipe joints in pre-1980 cast iron sewer mains, which exposes the line to root intrusion from mature live oak and pecan trees common across central San Antonio. Live oak roots aggressively seek moisture and find pipe joints at depths of 4 to 8 feet. The same hard water that scales water heater tanks also accelerates mineral buildup inside sewer mains. Homeowners noticing slow drains across multiple fixtures often face a combined problem: scale, grease, and root intrusion in the same line. For background on how Edwards Aquifer hardness affects appliances, the water heater hard water scale impact article covers the same scale formation mechanism inside water heater tanks.

Pre-jetting camera inspection matters more in San Antonio than in cities with newer plumbing infrastructure. The combination of pre-1980 cast iron mains, clay soil shifting, and Edwards Aquifer scale means a sewer line passing visual exterior inspection still requires CCTV verification before any pressure is applied.

Frequently Asked Questions

What is the difference between hydro jetting and drain snaking?

Hydro jetting uses 1,500 to 4,000 PSI water to scour pipe walls clean across the entire interior diameter. Drain snaking uses a metal cable to punch through the clog and create a narrow channel. Jetting solves grease, scale, and biofilm buildup. Snaking solves isolated hair and object clogs.

How long does hydro jetting last?

Residential hydro jetting results last 2 to 4 years for kitchen and main sewer lines. Commercial grease lines and restaurant kitchens require service every 6 to 12 months because cooking oil rebuilds buildup faster than residential drain use.

Is hydro jetting safe for old cast iron pipes?

Older cast iron pipes tolerate hydro jetting at calibrated lower pressure between 1,500 and 2,500 PSI. A pre-jetting CCTV camera inspection confirms the pipe wall thickness and joint condition before pressure is applied. Severely corroded cast iron requires repair or replacement instead.

How often should I have my drains hydro jetted?

Schedule hydro jetting every 3 to 4 years for residential PVC pipes, every 18 to 30 months for older cast iron, annually for homes with mature trees within 20 feet of the sewer line, and quarterly for restaurant kitchens.

Can hydro jetting damage my pipes?

Hydro jetting damages pipes when PSI is not calibrated for the pipe material or when the line has cracks, severe corrosion, or partial collapses. Pre-jetting camera inspection prevents damage by confirming the safe PSI range for the specific pipe condition.

Does hydro jetting kill tree roots permanently?

Hydro jetting cuts visible root masses inside the pipe but does not kill the source tree. Roots regrow through the same joint within 6 to 24 months. Permanent solutions include pipe replacement, trenchless cured-in-place pipe lining, or annual root-inhibiting foam treatments.

Can hydro jetting be used on septic system lines?

Hydro jetting clears septic lateral lines and drain field distribution pipes at calibrated lower pressure between 1,500 and 2,200 PSI. The lower pressure removes biological mat buildup and root infiltration without dislodging the perforated pipe or surrounding gravel bed.

How is hydro jetting different from sewer camera inspection?

Sewer camera inspection diagnoses what is inside the pipe. Hydro jetting cleans the pipe. Most jetting jobs combine both: camera inspection first to confirm pipe condition and calibrate PSI, jetting to clear the buildup, then a second camera pass to verify the cleaning is complete.

Should I hydro jet my drains as preventive maintenance?

Preventive hydro jetting makes sense for restaurant kitchens, homes with mature trees over the sewer line, multi-family rental properties, and pre-1980 homes with cast iron sewer mains in San Antonio. Single-family homes with modern PVC plumbing benefit from jetting after recurring clogs rather than on a fixed schedule.

Schedule Hydro Jetting Service in San Antonio

Anchor Plumbing Services performs pre-jetting CCTV camera inspection, calibrated PSI cleaning, and final verification across San Antonio. Every job runs under Master Plumber Gerald S. Cortez (Texas License #41829) with a flat-rate written quote before work starts. Same-day service is available for sewer backups and full-line blockages.

Call 210-843-5800 to schedule professional hydro jetting in San Antonio or read our 4.9-star plumbing reviews from more than 1,500 customers.

Water Softener Maintenance

Water Softener Maintenance

Water Softener Maintenance: Tasks, Frequency, Costs, and Professional Service

Water Softener Maintenance

Regular water softener maintenance improves efficiency and extends system lifespan. Neglecting maintenance causes scale buildup, reduced efficiency, and potential repair costs.

Homeowners ask how to clean the brine tank or what specific tasks are necessary. This comprehensive guide can walk you through key maintenance steps, troubleshooting salt bridging, resin fouling, clogged venturi injector, stuck float, and when to seek professional help.

Why Water Softener Maintenance Matters

Maintenance prevents scale, protects appliances, and keeps hardness within the target GPG. Clean brine components and accurate regeneration settings preserve resin capacity and lower energy waste in heaters and dishwashers.

Maintaining water softener helps to extend system life. Regular maintenance prevents the system from overworked and minimizes the risk of breakdowns, and costly repairs or replacements. Tasks like cleaning the brine tank, breaking salt bridges, and verify valve settings to keep performance stable.

What kind of maintenance does a water softener need? Basic maintenance includes monitoring the brine tank levels, cleaning the resin tank, and ensuring proper control valve function. These routine tasks improve system performance and prevent costly repairs.

Understanding Your Water Softener System

Water softeners remove calcium and magnesium through an ion exchange, replacing hard minerals with sodium or potassium ions. To fully grasp how this system transforms hard water into soft, explore our guide on How Water Softener Works—we break down the process step-by-step.

Key components requiring regular attention include:

  • Resin Tank: This is where the ion exchange happens. It requires checking for clogs or buildup that could affect its performance.
  • Brine Tank: This tank holds the salt or potassium used in the regeneration process. Regular cleaning is recommended to free up residue that could interfere with proper regeneration.
  • Control Valve & Regeneration Cycle: The control valve manages the regeneration process. Over time, maintenance may be needed to ensure the system is regenerating properly.

How to maintain a home water softener system? Start by checking these components regularly, clean them as needed, and make sure the system is running on schedule to keep your water softener in top shape.

Water Softener Maintenance Tasks

Monthly salt checks and quarterly brine cleaning keep soft water stable. Break salt bridges. Remove mushing. Clean the venturi and screen to restore brine draw. Verify regeneration settings to match household hardness and usage.

By performing regular checks and cleaning, you are able to extend the life of your system and prevent common problems.

Regular Checks & Cleaning

  • Salt Levels: Always check the salt levels in the brine tank. Low salt prevents proper regeneration. Refill the brine tank to maintain softness. Use the right type of salt recommended by the manufacturer to avoid clogging or excessive buildup.
  • Cleaning the Brine Tank: Over time, mineral deposits and salt buildup can accumulate inside the brine tank. Cleaning it every 3-6 months helps prevent these issues and helps smooth operation.
  • Salt Bridges and Mushing: Salt bridges form when the salt in the tank hardens into a crust, while mushing occurs when the salt turns into a sludge. Both can interfere with regeneration. Inspect for these issues regularly and break up any bridges or remove mushy salt.

How often should you clean your water softener? Check salt monthly. Clean the brine tank every 3 to 6 months. Follow your model manual for volumes and settings. This can help maintain efficiency and prevent future issues.

Your Water Softener is Quietly Failing—Act Before It’s Too Late!

Ignored maintenance turns your water softener into a ticking time bomb. Anchor Plumbing Services’ expert tune-ups prevent salt bridges, resin bed collapse, and efficiency crashes—but our calendar is 90% booked this month. Wait, and you’ll face gritty showers, skyrocketing salt costs, and a full system breakdown.

Secure one of our final maintenance slots NOW to keep your water silky-soft and your home protected. Procrastination costs more than a service call.

Flat Rate Pricing

Same-Day Service

Satisfaction Guarantee

Troubleshooting Common Water Softener Issues

While water softeners are relatively low-maintenance, they can experience issues from time to time. Here are some signs that your water softener may be malfunctioning:

  • Water Still Feels Hard: If your water still feels hard, common causes may include issues with the resin tank or regeneration cycle.
  • Low Water Pressure: A clogged or malfunctioning softener can restrict water flow, resulting in lower water pressure throughout your home.
  • Strange Odors or Tastes: Unpleasant smells or tastes can indicate that the system isn’t properly removing contaminants, or the brine tank may need cleaning.

Quick Fixes vs. Serious Issues

  • Quick Fixes: Resetting the system, checking the settings, and maintaining correct salt levels may help resolve minor problems. It’s also worth cleaning the brine tank and checking for salt bridges if the water feels hard.
  • When to Call for Full Repairs: If the issues persist or there are signs of a more significant malfunction, like broken parts or a failed control valve, call a licensed technician. Full repairs may be necessary to restore the system’s efficiency and prevent further damage.

DIY vs. Professional Water Softener Upkeep: What You Can Do & When to Call an Expert

When it comes to maintaining your water softener, there are a few tasks you can do. However, some issues require the expertise of a professional. Let’s break it down:

DIY Water Softener Maintenance

  • Routine Salt Refills and Cleaning: Keeping your water softener running smoothly starts doing these tasks adding salt to the brine tank and cleaning tank. Checking salt levels and cleaning the brine tank every few months is easy to do and can prevent many common problems.
  • Flushing the System & Checking for Leaks: Flush the brine tank and injector path to reduce mineral residue. Inspect for leaks around the unit, as this can affect the performance and longevity of your system. Regular flushing can help the softener run at peak efficiency.

When to Call a Professional

  • System Malfunctions: If the water softener isn’t performing correctly, like when water still feels hard, a professional may be needed. Issues such as malfunctioning control valves or problems with the resin beads require expert repair or replacement.
  • Replacing Parts: If your system’s key components like resin beads or control valves are damaged, it’s best to call a professional. These parts are used for effective water softening and need to be replaced by someone with the right experience.
  • Annual Professional Inspections: Annual professional inspections may help identify potential issues early. These inspections often prevent costly repairs by catching issues early.

The Impact of Hard Water & Plumbing Health

Lack of maintenance may contribute to scale buildup, which impacts plumbing performance over time. When your system isn’t working properly, minerals like calcium and magnesium build up in your pipes and appliances.

  • Scale Buildup: Scale deposits in your pipes restrict water flow and cause clogging. Over time, this reduces the efficiency of appliances like dishwashers and water heaters, leading to breakdowns and repairs.
  • Plumbing Efficiency: Soft water helps reduce mineral buildup in pipes, supporting plumbing efficiency. If your softener isn’t maintained, your entire plumbing system suffers from the effects of hard water.
  • Preventing Damage: Neglecting your water softener leads to pipe leaks, bursts, and the corrosion of appliances. It raises energy use and shortens appliance life.

Extending the Life of Your Water Softener

To get the most out of your water softener, you need to take the right steps to keep it in top condition.

  • Best Practices for Efficiency: Regularly check salt levels, clean the brine tank, and inspect for salt bridges or mushing. These simple steps help maintain performance and prevent issues down the road.


  • Signs It’s Time for a Replacement: If your system starts to malfunction frequently or isn’t performing as it should, it might be time for an upgrade. Look for signs such as inconsistent water softness or constant repairs.


  • Professional Servicing: Schedule annual valve inspection and injector cleaning to preserve system longevity. A professional technician catches any issues early and makes sure your system remains in optimal condition, helping you avoid expensive repairs.

Professional Water Softener Repair & Replacement Services in TX

At Anchor Plumbing Services, we specialize in keeping your water softener system in top condition. Whether you need a simple repair or a full system replacement, our Water Softener Services ensure your home is protected from hard water damage. Serving homeowners across TX, we provide expert solutions to keep your plumbing efficient and problem-free.

Why Choose Professional Repair & Replacement?

Even with regular water softener maintenance, issues like salt bridging, clogged valves, or resin bed failure can affect performance. Our skilled technicians:

  • Diagnose & Fix Problems Quickly – From minor adjustments to major repairs, we restore your system’s efficiency.
  • Prevent Costly Water Damage –  A faulty softener can lead to hard water buildup, damaging pipes and appliances.
  • Offer Full System Replacement – If your unit is beyond repair, we’ll install a new, high-quality softener tailored to your home’s needs.

What is the Cost of Maintaining a Water Softener System?

Maintenance costs vary depending on the system and service required. Budget $40 to $120 per year for salt and $100 to $300 for annual professional service. If a full replacement is needed, investing in a high-efficiency system can save you money on repairs and improve long-term performance.

Final Thoughts: Keeping Your Water Softener Running Smoothly

Maintaining your water softener system is key to ensuring your home’s plumbing stays protected from hard water damage. Regular upkeep, like checking salt levels, cleaning the brine tank, and scheduling professional inspections, can extend the lifespan of your unit and prevent costly repairs.

To keep your system in top shape:

  • Perform routine maintenance like flushing and refilling salt.
  • Stay alert for signs of inefficiency, such as low water pressure or hard water issues.
  • Schedule professional servicing to catch problems before they worsen.

By following these steps, you’ll enjoy softer water, longer-lasting appliances, and a more efficient plumbing system. Need expert help? Our team is ready to assist with servicing, repairs, and replacements to keep your water softener running smoothly.

Note: While this guide offers general maintenance advice, always consult your system’s manual for model-specific recommendations.

Why Settle for ‘Good Enough’ When Plumber’s a Call Away?

Premium drain and plumbing service that’s faster, smarter, and built to last.

  • 24/7 Emergency Service
  • Financing options
  • 100% satisfaction guarantee
  • Transparent, upfront pricing
  • Licensed Technicians
  • All Posts
  • Plumbing
  • Septic System
water softener guide

Water Softener Guide: How to Choose, Size, and Maintain a System for Your San Antonio Home in 2026

Water Softener Guide: How to Choose, Size, and Maintain a System for Your San Antonio Home in 2026

water softener guide

A water softener system removes calcium and magnesium from your home’s water supply using a process called ion exchange. San Antonio water from the Edwards Aquifer measures 15 to 20 grains per gallon (GPG) of hardness, which places it in the “very hard” category on the USGS scale. At this hardness level, a whole house water softener protects plumbing, extends appliance life by 30 to 50%, reduces soap and detergent use by 50 to 75%, and prevents the white mineral scale that builds up on faucets, showerheads, and inside pipes.

A residential water softener system costs $500 to $2,500 for the unit. Professional softener installation adds $200 to $500 in labor. Ongoing costs run $60 to $120 per year in salt. This guide covers how water softeners work, the 3 system types, how to size a softener for your household, what installation involves, what maintenance looks like, and how to decide if your San Antonio home needs one.

What Is a Water Softener and How Does It Work?

A water softener is a water treatment system that removes hard water minerals (calcium and magnesium) through ion exchange. The softener system consists of 2 tanks: a resin tank and a brine tank. The resin tank contains thousands of small resin beads charged with sodium ions. When hard water flows through the resin tank, the calcium and magnesium ions are attracted to the resin beads. The resin releases sodium ions into the water in exchange for the hardness minerals. The result is soft water flowing to every fixture and appliance in the home.

When the resin beads are saturated with calcium and magnesium, the softener enters a regeneration cycle. During regeneration, a concentrated salt-and-water solution (brine) from the brine tank flushes through the resin tank. The brine strips the hardness minerals off the resin and replaces them with fresh sodium ions. The mineral-laden brine water is flushed to a drain. The entire regeneration process takes 60 to 90 minutes. Modern demand-initiated softeners regenerate only when needed based on water usage, while timer-based systems regenerate on a set schedule regardless of use.

How Do You Know If Your San Antonio Home Needs a Water Softener?

San Antonio homes on SAWS municipal water receive hard water measuring 15 to 20 GPG from the Edwards Aquifer. At this level, every home in the SAWS service area benefits from a water softener. The USGS classifies water above 10.5 GPG as “very hard.” Here are 7 signs that hard water is affecting your home:

  1. White, chalky mineral deposits on faucets and showerheads: Calcium scale builds up on every surface that contacts water. The white residue requires acidic cleaners to remove and returns within days.
  2. Soap and shampoo do not lather well: Hard water minerals react with soap to form a curd instead of suds. Soft water requires 50 to 75% less soap and detergent.
  3. Dishes have white spots or film after washing: Mineral residue dries on glassware and dishes. Dishwashers in hard water homes use more detergent and still produce spotty results.
  4. Skin feels dry or itchy after showering: Calcium and magnesium disrupt the skin’s natural barrier. A 2021 study in the Journal of Investigative Dermatology found that hard water exposure contributes to eczema, dryness, and irritation.
  5. Laundry feels stiff and colors fade faster: Mineral deposits trap in fabric fibers, making towels rough and shortening clothing lifespan.
  6. Water heater efficiency is declining: Scale buildup on water heater heating elements acts as insulation, forcing the unit to consume more energy. A Water Quality Research Foundation study found that water heaters on hard water lost up to 29% efficiency over a simulated 15-year lifespan.
  7. Plumbing repairs are increasing: Scale narrows pipe diameter over time, restricting flow and stressing joints. Homes with untreated hard water at 15+ GPG experience accelerated pipe corrosion and more frequent fixture failures.

What Are the 3 Types of Water Softener Systems?

There are 3 types of water softener systems for residential homes: salt-based ion exchange softeners, salt-free water conditioners, and electronic descalers. Each type addresses hard water differently.

What Is a Salt-Based Ion Exchange Water Softener?

A salt-based softener system is the most common and most effective type. It physically removes calcium and magnesium from the water through ion exchange and replaces them with sodium. The softened water is genuinely “soft” by definition. Salt-based systems require a brine tank that holds softener salt (sodium chloride or potassium chloride). The system regenerates every 3 to 7 days depending on water usage and hardness level.

For San Antonio’s 15 to 20 GPG hardness, a salt-based system is the recommended choice. Salt-free conditioners cannot effectively handle water above 10 to 15 GPG. A salt-based softener removes 100% of the hardness minerals. Cost: $500 to $2,500 for the unit.

What Is a Salt-Free Water Conditioner?

A salt-free soft water conditioner does not remove hardness minerals from the water. Instead, it changes the mineral structure using template-assisted crystallization (TAC) so the minerals cannot form scale on surfaces. The water technically remains “hard” by measurement, but the scaling behavior is reduced. Salt-free systems require no brine tank, no salt, no electricity, and produce no wastewater during regeneration.

Salt-free conditioners work for mild to moderate hardness (under 10 to 15 GPG). They do not provide the slippery feel of soft water, do not improve soap lathering, and cannot handle the 15 to 20 GPG hardness level common in San Antonio. They are a better fit for homes with moderate hardness that want reduced scale without the maintenance of a salt-based system.

What Is an Electronic Water Descaler?

An electronic descaler wraps around the incoming water pipe and sends electromagnetic pulses through the water. The theory is that these pulses alter the behavior of dissolved minerals to reduce scale adhesion. Electronic descalers are the least expensive option ($100 to $300) and require no plumbing modifications. However, independent testing shows mixed results, and they do not remove any minerals from the water. Most plumbing professionals do not recommend electronic descalers as a primary solution for very hard water.

What Size Water Softener Do You Need for Your Home?

The right softener size depends on 2 factors: daily water usage and water hardness. The formula is: number of people in the household x 80 gallons per day x grains per gallon of hardness = daily grain removal needed. Multiply the daily grain total by 7 (days between regenerations) to get the required grain capacity.

Here is the softener sizing table for San Antonio homes at 17.5 GPG (midpoint of the 15 to 20 GPG range):

Household Size

Daily Grain Removal

Weekly Grain Capacity

Recommended System Size

1 to 2 people

1,400 to 2,800 grains/day

9,800 to 19,600 grains

24,000 to 32,000 grain

3 to 4 people

4,200 to 5,600 grains/day

29,400 to 39,200 grains

32,000 to 48,000 grain

5 to 6 people

7,000 to 8,400 grains/day

49,000 to 58,800 grains

48,000 to 64,000 grain

7+ people

9,800+ grains/day

68,600+ grains

64,000+ grain or dual tank

An undersized softener regenerates too frequently, wasting salt and water. An oversized softener regenerates too infrequently, allowing resin to sit stagnant and develop bacterial growth. Proper softener sizing matches the system capacity to your household’s actual daily demand. A plumber tests your water hardness with a testing kit and recommends the correct grain capacity during a water softener installation assessment.

How Much Does a Water Softener System Cost in San Antonio in 2026?

A whole house water softener costs $500 to $2,500 for the unit in 2026. Professional softener installation adds $200 to $500 in labor. Here is the full cost breakdown:

Cost Category

Price Range

Notes

Salt-based softener (unit)

$500 to $2,500

32K to 64K grain capacity

Salt-free conditioner (unit)

$800 to $3,000

No salt, no drain needed

Electronic descaler (unit)

$100 to $300

Least effective for very hard water

Professional installation

$200 to $500

Includes plumbing connections and bypass valve

Annual salt cost

$60 to $120/year

40-lb bag every 4 to 6 weeks at $5 to $8 each

Annual maintenance

$100 to $250/year

Optional service contract for annual inspection

Resin replacement (every 10 to 15 yrs)

$200 to $400

Extends system life to 20+ years

The Department of Energy and independent studies consistently find that homeowners in hard water areas recoup the water softener investment within 2 to 5 years through reduced appliance wear, lower energy bills (water heaters run up to 29% more efficiently on soft water), and 50 to 75% savings on soap and detergent. Over a 10-year ownership period, total cost is approximately $1,200 to $3,600. Hard water damage to pipes, appliances, and fixtures in the same period costs $800+ per year in premature replacements and repairs.

What Does Water Softener Installation Involve?

Professional softener installation takes 2 to 4 hours and involves 5 steps:

  1. Identify the installation location: The softener installs where the main water line enters the home, before the line splits to individual fixtures. Common locations include the garage, utility closet, or near the water heater. The location needs access to a drain for regeneration wastewater, an electrical outlet for the control valve, and enough floor space for both the resin tank and brine tank.
  2. Cut into the main water line: The plumber shuts off water to the home, cuts the main supply line, and installs the softener bypass valve and connections. A bypass valve allows water to flow directly to the home without passing through the softener during maintenance.
  3. Connect the resin tank and brine tank: The resin tank connects to the incoming and outgoing water lines. The brine tank connects to the resin tank via a brine line. A drain line from the control valve routes to the nearest floor drain, utility sink, or exterior drain.
  4. Program the softener settings: The plumber programs the control valve with your water hardness level (measured in GPG), household size, and regeneration preferences. Demand-initiated regeneration (metered) is recommended over timer-based regeneration because it uses salt only when needed.
  5. Test the system: The plumber runs the system through a manual regeneration cycle to verify connections, check for leaks, and confirm softened water is reaching all fixtures. A before-and-after hardness test at the kitchen faucet confirms the softener is removing minerals.

San Antonio plumbing code requires a licensed plumber for any work that involves cutting into the main water supply line. DIY installation is possible on some systems using SharkBite or PEX fittings, but improper installation can cause leaks, pressure loss, or cross-contamination. Professional installation includes warranty protection on the work.

A properly maintained water softener lasts 15 to 20+ years. The resin inside the tank lasts 10 to 15 years. The valve and tanks can last 20+ years. Softener maintenance is minimal but consistent. Here are the 6 maintenance tasks:

  1. Check and refill the salt level monthly: Keep the brine tank at least half full of salt. Use high-purity evaporated salt pellets for cleanest performance. Avoid rock salt, which contains insoluble impurities that accumulate in the brine tank.
  2. Break up salt bridges: A salt bridge is a hard crust that forms across the top of the salt in the brine tank, creating a hollow space underneath. The softener cannot make brine properly when a bridge exists. Push a broom handle gently into the salt to check for and break up any bridge that has formed.
  3. Clean the brine tank once per year: Empty remaining salt, scrub the interior with warm soapy water, rinse, sanitize with a solution of 0.25 cup household bleach in 2 to 3 gallons of water, rinse again, and refill with fresh salt.
  4. Clean the resin bed every 3 to 4 months: Pour a resin cleaner (available at hardware stores) into the brine tank before a regeneration cycle. The cleaner dissolves calcium and iron deposits that accumulate on the resin beads over time.
  5. Clean the venturi valve every 6 months: The venturi valve creates the suction that draws brine into the resin tank during regeneration. Sediment or mineral buildup in the venturi reduces suction and causes incomplete regeneration. Remove the valve cover, clean the screen and nozzle with warm water, and reassemble.
  6. Test water hardness annually: Use a home test strip or have a plumber test the water at a faucet downstream of the softener. If the test shows hardness above 1 GPG in the softened water, the softener needs adjustment, resin cleaning, or resin replacement.

What Is the Difference Between a Water Softener and a Water Filter?

A water softener and a water filtration system serve different purposes. A softener removes hardness minerals (calcium and magnesium) to prevent scale and improve soap performance. A water filter removes contaminants (chlorine, sediment, heavy metals, bacteria, chemicals) to improve water taste, odor, and safety. A softener does not filter contaminants. A filter does not soften water.

Many San Antonio homeowners install both. The water filtration system removes chloramine (the disinfectant SAWS uses), sediment, and dissolved solids. The water softener removes the hardness minerals. When both are installed, the carbon filter goes before the softener in the sequence to remove chlorine or chloramine first, which protects the softener’s resin from chemical degradation.

Why Settle for ‘Good Enough’ When Plumber’s a Call Away?

Premium drain and plumbing service that’s faster, smarter, and built to last.

  • 24/7 Emergency Service
  • Financing options
  • 100% satisfaction guarantee
  • Transparent, upfront pricing
  • Licensed Technicians
  • All Posts
  • Plumbing
  • Septic System

Frequently Asked Questions About Water Softeners

How does a water softener work?

A water softener uses ion exchange. Hard water flows through a resin tank where calcium and magnesium ions stick to resin beads. Sodium ions release into the water in exchange. The softener regenerates with a salt brine solution to recharge the resin.

Multiply the number of people in the home x 80 gallons per day x your water’s GPG hardness x 7 days. A 3 to 4 person San Antonio home at 17.5 GPG needs a 32,000 to 48,000 grain system.

The unit costs $500 to $2,500. Professional installation adds $200 to $500. Annual salt costs $60 to $120. Total first-year cost: $760 to $3,120. The investment pays back in 2 to 5 years through energy, soap, and appliance savings.

A typical household adds a 40-lb bag of salt every 4 to 6 weeks. Check the brine tank monthly and keep it at least half full. Use evaporated salt pellets for best results.

A salt-based water softener removes hardness minerals through ion exchange. A salt-free water conditioner changes the mineral structure to reduce scaling but does not remove the minerals. Conditioners are less effective for very hard water above 15 GPG.

A salt-based water softener removes hardness minerals through ion exchange. A salt-free water conditioner changes the mineral structure to reduce scaling but does not remove the minerals. Conditioners are less effective for very hard water above 15 GPG.

Why Is a Water Softener One of the Most Valuable Plumbing Investments for San Antonio Homes?

San Antonio sits on the Edwards Aquifer, one of the hardest water sources in Texas at 15 to 20 GPG. Every home in the SAWS service area receives water that causes scale buildup on fixtures, reduces water heater efficiency by up to 29%, shortens appliance lifespans by 30 to 50%, and increases soap and detergent consumption by 50 to 75%. A water softener system addresses all of these issues by removing calcium and magnesium before the water reaches any fixture or appliance in the home.

A salt-based ion exchange softener is the recommended type for San Antonio’s hardness level. Proper sizing based on household size and local GPG ensures the system regenerates efficiently without wasting salt. Professional installation takes 2 to 4 hours and includes programming the softener settings for San Antonio’s specific water chemistry. Maintenance is minimal: monthly salt checks, annual brine tank cleaning, and a resin cleaner every 3 to 4 months.

Anchor Plumbing Services provides NOVO-certified water softener installation in San Antonio and surrounding Bexar County communities. Every installation is performed by Texas-licensed plumbing technicians under Master Plumber oversight. We test your water hardness, recommend the correct system size, and provide flat-rate written quotes before any work begins. Our team carries a 4.9-star rating across 1,500+ verified reviews and backs every installation with a satisfaction guarantee. Call us today at 210-843-5800 or book online for a water softener assessment.

shower hub

Ensuring Clean Water Through Testing Services in San Antonio, TX

Clean and safe water is a necessity, an essential component of life that touches every facet of our existence. It flows through our bodies, nourishing and revitalizing us. Water holds an even deeper significance in San Antonio, TX. Nestled against a rugged landscape, San Antonio draws its water from diverse sources the mighty Edwards Aquifer, the Guadalupe River, and the seemingly endless expanse of the Carrizo-Wilcox Aquifer. However, amidst this abundance, quality concerns ripple. Understanding the intricacies and challenges of San Antonio’s water sources is crucial.

Importance of Water Testing Services in San Antonio

Water testing is a broad area with many applications and benefits. Let’s look at a few of them.

Safe Consumption Assured

Your health and safety depend on the water you consume. Contaminants can silently infiltrate water sources, posing risks to you and your loved ones. Water testing services are your protectors, carefully examining water samples to identify potential dangers.

By providing timely insights into water quality, these services empower authorities to make informed choices and enable you to consume water without worry. Through this vigilance, water testing services shield your well-being against the threats of waterborne diseases.

Sustaining Nature Around You

The water bodies in and around San Antonio are not just water sources but intricate ecosystems supporting diverse plant and animal life. Pollutants can disrupt this delicate balance and harm these ecosystems. Water testing services go beyond safeguarding humans — they also ensure the harmony of aquatic life and the environment.

Fueling Industries Around You

Water is essential not only for households but also for industries that drive your local economy. Manufacturing, agriculture, and more rely on water for various processes. If water is tainted, it could disrupt production and impact people’s livelihoods. Water testing services provide industries with vital information to ensure their water supply is clean.

Empowering Awareness

Water testing services offer educational possibilities beyond labs. Schools and colleges can collaborate with these services, giving students hands-on exposure to real-world science. Analyzing water samples engages students in practical learning, nurturing an interest in environmental science and public health. Water quality information can also drive awareness campaigns that foster a sense of responsibility. This approach creates a consciousness of the environment and advocacy for its protection.

Prompt Responses to Emerging Threats

New threats to water quality can emerge unexpectedly. Water testing services ensure you stay ahead by promptly detecting emerging contaminants. With their advanced technologies and expert analysis, they provide early warnings, enabling you and your community to take proactive measures to address potential risks.

Common Contaminants in Texas Water

Beneath the surface of seemingly clear water lies a complex world of contaminants. From agricultural runoff to industrial discharges, various substances can find their way into Texas water sources. Below are some of the common contaminants.

Bacterial and Viral Intruders

Microorganisms like bacteria and viruses can infiltrate water sources, posing significant health risks. If present, fecal matter from humans and animals can introduce harmful pathogens. Waterborne diseases like E. coli and Cryptosporidium can result from these contaminants.

Chemical Conundrum

Pharmaceuticals, personal care products, and industrial chemicals are compounds that can contaminate water. Traditional water treatment processes may not always target these substances. Water testing services, however, employ advanced techniques to identify and quantify these chemical compounds.

Legacy of Lead

Old plumbing systems, including lead pipes and fixtures, can introduce lead into drinking water. Lead exposure is particularly harmful to children and can result in developmental and cognitive issues. Timely identification of lead contamination allows you to take necessary precautions and replace aging plumbing infrastructure.

Nitrate Nuisance

Nitrate contamination often stems from agricultural activities, where excess fertilizers enter water sources. High nitrate levels can pose health risks, particularly for infants, affecting oxygen transport in the bloodstream.

Radiation Worries

Radioactive elements can also be present in water, originating from both natural sources and human activities like nuclear facilities. Radioactive substances can have long-term health implications, making their detection crucial.

Types of Water Testing Services Available

Water testing services offer comprehensive chemical analysis to uncover the intricate composition of your water. Here are some of the main tests available.

Microbial Detection

Microbial testing employs cutting-edge methods to detect and quantify harmful microorganisms in your water, such as bacteria and viruses. By identifying these hidden pathogens, water testing allows you to take steps to ensure your water is free from waterborne diseases.

Targeted Analysis for Specific Threats

Depending on regional factors and local industries, water can be vulnerable to specific contaminants. Water testing services offer contaminant-specific screening, focusing on detecting particular pollutants relevant to your area. Whether it’s heavy metals, agricultural chemicals, or industrial byproducts, these services tailor their analysis to uncover the threats your water sources might face.

Radiological Testing

For areas with potential exposure to radioactive elements, radiological testing becomes essential. Water testing services use specialized equipment to detect and quantify natural and artificial radioactive substances in your water.

Lead and Heavy Metal Detection

Water testing services identify trace amounts of heavy metals that might be present in your water, even at levels that aren’t immediately detectable. This type of testing is vital, especially in older communities where lead pipes and fixtures might still be in use.

Periodic Monitoring

Water quality can change over time due to various factors such as weather conditions, human activities, and natural processes. Periodic monitoring, however, ensures that your water quality remains consistent. Conducting regular tests to track any fluctuations in water quality can promptly identify any emerging contaminants. This proactive approach makes it possible to address potential issues before they become major concerns.

Emergency Response Testing

In times of emergencies, such as chemical spills or natural disasters, water sources can be at risk of contamination. Water testing services offer emergency response testing, providing quick and accurate water quality assessments. This immediate testing allows authorities to make informed decisions and implement necessary measures to protect public health and the environment during critical situations.

Business Applications

Businesses have unique water quality requirements based on their processes and products. Water testing services offer customized solutions to cater to these specific needs. Whether geared toward compliance with regulatory standards or ensuring product quality, these services work closely with businesses to develop testing protocols that align with industry requirements.

Residential Solutions

Most people, however, are more interested in having clean, safe, drinkable water in their homes. That’s why our experts at [company_name] provide comprehensive residential water testing to our neighbors in San Antonio. Once you have this service performed, you’ll be forewarned of any contaminants in your water supply, and we can recommend extremely effective solutions to correct the problem. When you know your water has been purified, you’ll imbibe peace of mind with every swallow you take.

In addition to water testing services, our team at [company_name] is dedicated to offering diverse solutions to meet various needs within the San Antonio community. We understand that a well-rounded approach to maintaining the overall well-being of your environment involves more than just water testing. That’s why our expertise extends to a range of services that play a vital role in your daily life. Here are some of them:

  • Plumbing installation, inspection, and repair
  • Sewer line cleaning and repair
  • Garbage disposal installation and repair
  • Water heater maintenance
  • Toilet repair and replacement
  • Water treatment services

Our commitment to excellence is geared toward enhancing the quality of life for you, your family, and your community. When you work with us, you’re choosing a team of skilled professionals dedicated to superior service. Contact us at [company_name] today to schedule an appointment anywhere in the San Antonio area.

Plumbing Performing Maintenance on Water Heater in San Antonio, TX

Understanding Heat Pump Water Heaters

Heat pump water heaters are essential appliances that efficiently heat water. They use a unique mechanism that extracts heat from the surrounding air or ground and transfers it to the water. This results in significant energy savings compared to traditional water heaters.

How Heat Pump Water Heaters Work

Heat pump water heaters work based on the principles of heat transfer and refrigeration cycles. The core principle behind heat pump water heaters is the extraction of heat from the surrounding air and transferring it to the water in a storage tank. The process starts with a fan and an evaporator coil. The fan draws in ambient air from the surroundings and directs it over the evaporator coil. The evaporator coil contains a refrigerant that has a low boiling point.

As the ambient air passes over the evaporator coil, the refrigerant absorbs the heat energy from the air, causing it to evaporate into gas form. This phase change from liquid to gas absorbs a considerable amount of heat from the air, even at low temperatures.

The refrigerant, now in gaseous form, passes through a compressor. The compressor, which is an electrically powered device, increases the pressure and temperature of the refrigerant gas. This compression process further enhances the heat energy contained in the refrigerant. As a result, the temperature of the refrigerant increases significantly, making it suitable for transferring heat to the water.

Next, the high-pressure and high-temperature refrigerant gas flows through a condenser coil. Inside the condenser coil, the refrigerant releases its heat energy into the water stored in the tank. This heat transfer occurs through a heat exchanger, which is a coil or tube immersed in the water. The heat from the refrigerant is transferred to the water, raising its temperature.

After transferring heat to the water, the refrigerant changes into a liquid state as it cools down. It then passes through an expansion valve, which reduces its pressure and temperature, preparing it for the next cycle of heat absorption in the evaporator coil. The cycle repeats as long as the heat pump water heater is operating.

To further improve the efficiency of a heat pump water heater, some models use additional components, such as a backup electric resistance heating element. This heating element is activated only when there is a high demand for hot water or during periods when the heat pump is unable to extract sufficient heat from the air, such as in very cold climates.

Heat pump water heaters also feature controls and sensors to monitor and regulate the system’s operation. These controls ensure the heat pump operates optimally, activating or deactivating components as needed to maintain the desired water temperature and maximize energy efficiency.

Energy Efficiency

One of the significant advantages of heat pump water heaters is their high level of energy efficiency. They can deliver up to three times more heating energy compared to the electrical energy they consume. This efficiency is achieved by transferring heat from the surrounding air or ground to heat the water rather than generating heat directly. As a result, heat pump water heaters can significantly reduce energy consumption and lower utility bills.

While heat pump water heaters are known for their energy efficiency, it’s still crucial to assess the energy efficiency rating of the model you plan to purchase. Look for an Energy Star-certified unit. This indicates higher efficiency and potential savings on utility bills. Compare different models’ energy factors (EF), with higher EF values indicating greater efficiency.

Cost Savings

Because of their energy efficiency, heat pump water heaters can lead to substantial cost savings in the long run. Although they may have a higher up-front cost compared to traditional water heaters, the savings achieved through reduced energy consumption can offset the initial investment over time. Additionally, some regions offer incentives, tax credits, or rebates for installing energy-efficient appliances.

Environmental Friendliness

Heat pump water heaters are environmentally friendly because they use less energy than traditional systems. By using ambient air or geothermal energy, they reduce the reliance on fossil fuels for water heating. This leads to a reduction in carbon dioxide and other harmful emissions, helping to mitigate climate change and promote a cleaner environment.

Durability and Longevity

Heat pump water heaters are designed to be durable and have a longer lifespan compared to traditional water heaters. They are built with high-quality components and typically require less maintenance. This longevity can result in further cost savings over time as the need for frequent replacements or repairs is minimized.

Location and Space Requirements

Heat pump water heaters typically require a suitable location with enough space for installation. Consider the dimensions of the unit and ensure you have adequate clearance around it for proper airflow and maintenance access. Additionally, evaluate the availability of suitable ventilation or ambient temperature in the chosen location, as heat pumps work more efficiently in moderate to warm climates.

Water Heating Needs

Consider your household’s hot water requirements to determine the appropriate size and capacity of a heat pump water heater. Assess the number of people in your household, daily hot water usage, and peak demand periods. Look for a model with a tank size and recovery rate that can meet your needs without excessive waiting times or the risk of running out of hot water.

Noise Level

Heat pump water heaters produce some degree of noise during operation. If the heat pump is installed in a living area or near bedrooms, you might prefer a quieter model with noise-reducing features.

Installation Cost and Compatibility

Consider the installation requirements and associated costs. Heat pump water heaters typically need professional installation because of their complexity. Ensure that the unit is compatible with your existing plumbing and electrical systems to avoid additional expenses for modifications. It may be a good idea to consult with an expert from [company_name] before you purchase a new unit to ensure that it will be compatible with your home’s current setup.

Maintenance and Lifespan

Familiarize yourself with the maintenance requirements of the heat pump water heater that you plan to purchase. Some models may require periodic filter cleaning or other maintenance tasks. Additionally, check the expected lifespan of the unit. Generally, high-quality heat pump water heaters can last 10 to 15 years or more with proper maintenance.

Warranty and Support

Always review the warranty information that is provided by the manufacturer. A longer warranty period indicates confidence in the product’s quality and can provide peace of mind. Additionally, check the availability of customer support and service centers in your area to ensure prompt assistance if needed.

Get in Touch With a Professional Today

Are you tired of dealing with clogged drains, persistent leaks, or faulty pipes in your home or business? Look no further than [company_name]! We specialize in top-notch drain cleaning, leak detection, and pipe repair services, ensuring that your plumbing system functions flawlessly. With our skilled technicians and state-of-the-art equipment, we quickly identify the source of the problem and provide efficient solutions.

But that’s not all; we also offer exceptional water heater services to keep your hot water flowing. This includes heat pump installation, maintenance, and repairs. Contact [company_name] today and let us serve you if you’re located in San Antonio or one of the surrounding areas.

Garbage Disposal Repair in San Antonio, TX

The Ins and Outs of Keeping a Clean Garbage Disposal

Like many homeowners, you might depend on your garbage disposal to help with daily kitchen cleanup. You can send food scraps down the drain and grind them away, making cleanup a breeze. Sometimes, though, it’s a good idea to turn your cleaning attention toward the garbage disposal itself. Learn how to clean your garbage disposal so that you can get into the habit of doing this chore regularly.

Why Clean Your Garbage Disposal

When food goes down your garbage disposal, remnants still remain. Instead of getting washed down the drainpipe, some of the pieces may get trapped around the grinders or the splash guard. Additionally, some foods will leave a residue that does not readily wash away by running water.

Since food remnants are organic materials, they’ll decay over time. As food decays, this provides a breeding ground for bacteria and other microbes. Mold or mildew might start to grow in your garbage disposal. Mold and mildew aren’t good for your health, and they can also produce terrible smells. Plus, scraps that accumulate in your garbage disposal can lead to clogs. A clogged sink can keep you from accomplishing your work in the kitchen.

Instead of running the risk of clogs or odors, resolve to clean your disposal regularly. It’s a good idea to add a quick cleaning session to your weekly household routine and perform deep cleanings as needed.

How to Clean the Top of Your Garbage Disposal

Anytime you’re cleaning the garbage disposal, be sure to cut the power to the appliance. Don’t just turn off the switch; make sure there’s no way for the disposal to turn on. You can do that by unplugging the appliance or turning off the corresponding circuit breaker.

Once the power has been cut, you can start cleaning the top portion of your garbage disposal that includes the drain area, the rubber baffle and the top of the grinding chamber.

Use a sponge that has a rough surface for scrubbing. Get your sponge wet and sudsy with dish soap. Start scrubbing around the drain. Work your way down to the baffle and scrub its topside and its underside thoroughly. Reach under the baffle — but not toward the grinders — and run the sponge around the top of the chamber. Don’t forget to rinse the sponge often as you work and add more soap if needed.

Your baffle may be removable. If so, taking it out can give you better access to all the nooks and crannies where gunk might be hiding.

You should also shine a light into your garbage disposal. If you see any large pieces of food or other foreign objects, reach in with tongs to grab them. Never reach into the garbage disposal with your hand.

How to Deep Clean Your Garbage Disposal

While the soap and water will be effective for cleaning the top portion of your garbage disposal, it’s a good idea to occasionally clean the rest of the unit. A deep cleaning will freshen both the chamber and the grinders.

One of the easiest ways to clean inside the garbage disposal chamber involves boiling water. Heat a pot of water on the stove until the water reaches a boil. Then, carefully dump the hot water down the drain.

Clean your garbage disposal with boiling water once a month. In addition, deep clean your garbage disposal with a vinegar and baking soda mixture and clean the blades with ice.

You can use vinegar and baking soda mix to lift away some of the gunk that has built up inside your appliance. Dump 1/2 cup of baking soda down the disposal and follow it up with twice as much vinegar. Put the sink stopper over the opening and wait for at least 10 minutes. Then, remove the stopper and rinse the disposal with a steady stream of hot water.

Ice is also a handy tool when it comes to keeping your garbage disposal clean. Grinding ice will produce abrasive chips that can scrape away residue that is stuck to the blades. To clean your garbage disposal with ice, you’ll need to restore power to your unit. After that, dump ice into the disposal — enough to mostly fill the chamber. Top it off with 1 cup of vinegar or 1 cup of rock salt. Turn on the cold water tap and then flip the switch to power on the disposal. Leave the unit running until the ice has been completely ground.

How to Improve Garbage Disposal Odors

Sometimes, even a deep cleaning won’t take away serious garbage disposal odors. You may need to perform additional cleaning steps to deal with those.

Bleach can help, but you should never pour undiluted bleach down your disposal. Doing so could damage the unit’s parts. Instead, dilute household bleach with warm water. Use 1/4 or 1/3 cup of bleach and add twice as much water. Rinse the disposal thoroughly with fresh water after dumping in the bleach solution.

Citrus fruit is a handy odor-buster as well. After eating orange slices with your dinner or squeezing lemon into a glass of water, reserve the peels. Put them into the disposal, turn it on, and run cold water until the peels have been thoroughly ground.

What to Do About Serious Garbage Disposal Problems

While regular cleaning is important, it’s no match for professional garbage disposal care. You may need to call a plumber to solve your serious garbage disposal issues.

When your garbage disposal unit is totally clogged, putting ice or vinegar down the drain probably won’t take care of the problem. Fortunately, a plumber can safely and effectively clear the clog and get your appliance back in working order.

Regular cleaning may keep your disposal in good shape for many years. Eventually, though, you might get to the point where it no longer works as well and starts to leave behind more food particles. Also, unpleasant odors may often waft out of the disposal, even if you deodorize it regularly. Most garbage disposals last for 10 to 12 years. As you approach the end of a normal disposal life span, you may notice such issues developing more frequently.

It may be time to replace your garbage disposal instead of trying to clean it continuously. Professional plumbers will do the best job of installing a new garbage disposal. You can count on the job to be done safely and for the connections to be tight and leak-free.

Once you have a new garbage disposal, be sure to maintain a regular cleaning routine by implementing the above methods. A cleaning routine will keep your system in top shape for a long time to come.

If you are searching for top-quality plumbers who are committed to excellence, look no further than [company_name]. In addition to garbage disposals, we provide a wide array of plumbing services. If you reside in San Antonio or a surrounding area, call [company_name] for help with your toilets, faucets, sewer lines, drains, gas lines and more.

Water from Faucet Adjusted from Water Heater in San Antonino, TX

Water Heater Temperature Setting: How to Adjust for Safety, Savings, and Performance in 2026

The recommended water heater temperature setting is 120°F. The U.S. Department of Energy recommends 120°F as the standard for residential water heaters because it prevents scalding, slows mineral buildup and pipe corrosion, and reduces energy consumption by 6 to 10% compared to the factory default of 140°F. Most gas, electric, and tankless water heaters ship from the factory set to 140°F.

Adjusting the temperature on a gas water heater takes under 1 minute. Electric water heaters require turning off power at the breaker and removing an access panel. Tankless water heaters have a digital control panel where you press up or down arrows. This guide covers the exact steps for all 3 types, explains when to set the temperature higher or lower than 120°F, and includes San Antonio-specific factors that affect the right setting for your home.

What Temperature Should a Water Heater Be Set At?

A water heater should be set at 120°F for most residential households. This temperature kills harmful bacteria, prevents scalding, and reduces energy costs. Here is how the 3 recommended settings compare:

Temperature Safety Energy Cost When to Use
120°F (recommended) Low scald risk. 10+ minutes to cause a burn. Lowest. Saves $36 to $61/year in standby losses. Most households. Families with children or elderly members.
130°F Moderate risk. Burns in 30 seconds. Moderate. Homes with older dishwashers without booster heaters.
140°F (factory default) High risk. Third-degree burn in 5 seconds. Highest. Wastes $36 to $61/year vs. 120°F. Immunocompromised residents. Legionella concerns.

The Occupational Safety and Health Administration (OSHA) recommends a minimum of 122°F to prevent Legionella bacteria growth in the heater tank. Legionella thrives between 77°F and 113°F and causes Legionnaires’ disease, a severe form of pneumonia. Setting the thermostat below 120°F creates conditions for bacterial growth inside the tank. Setting it above 140°F wastes energy and creates a scalding hazard.

How Do You Adjust the Temperature on a Gas Water Heater?

Adjusting a gas water heater takes under 1 minute. The thermostat is a temperature control dial located on the gas control valve near the bottom of the heater tank. No tools are required. Here are the steps:

  1. Locate the temperature dial: Find the gas control valve on the front of the tank near the bottom. The temperature control dial is on this valve. On Rheem, AO Smith, and Whirlpool gas water heaters, the dial is typically marked with letters, symbols, or numbers instead of exact temperatures.
  2. Understand the dial markings: “Low” or a solid circle = 90°F to 100°F. “Hot” or a triangle = 120°F (the recommended setting). “A” = approximately 130°F. “B” = approximately 140°F. “C” = approximately 150°F. “Very Hot” = 160°F. If the dial has numeric markings, turn it to 120.
  3. Turn the dial to 120°F (or the “Hot” / triangle setting): Turn clockwise to increase, counterclockwise to decrease.
  4. Wait 3 hours, then test the water temperature: Run hot water at the faucet farthest from the heater for 3 minutes. Hold a cooking thermometer or digital thermometer under the stream. If the reading is not at your target, make a small adjustment and wait another 3 hours.

Gas water heater thermostat dials are notoriously inaccurate. The actual water temperature can differ by 10°F or more from the dial setting. Always verify with a thermometer at the tap.

How Do You Adjust the Temperature on an Electric Water Heater?

Electric water heaters require turning off power at the circuit breaker before accessing the thermostat. The thermostat sits behind a metal access panel on the side of the electric water tank, not on the exterior like a gas unit. Here are the steps:

  1. Turn off power at the circuit breaker: Locate the breaker for the water heater in your electrical panel and flip it to the off position. Electricity and water are a lethal combination. Never open an access panel with the power on.
  2. Remove the access panel(s): Use a Phillips screwdriver to remove the metal panel(s) on the side of the tank. Most electric water heaters have 2 panels, 1 upper and 1 lower, each covering a heating element and thermostat.
  3. Pull back the insulation: Behind the panel is fiberglass or foam insulation. Gently move it aside to expose the thermostat dial. Wear gloves to avoid skin irritation from fiberglass.
  4. Adjust both thermostats to the same temperature: Use a flathead screwdriver to turn the thermostat dial. Set both the upper and lower thermostats to 120°F. Setting them to different temperatures causes one heating element to overwork, shortening the heater’s lifespan.
  5. Replace insulation and panels, then restore power: Press the insulation back into place. Screw the access panels on. Flip the breaker back to the on position. Wait 3 hours before testing the water temperature at the farthest faucet.

If an electric water heater has a red reset button (high-limit switch) visible behind the access panel, pressing it resets the safety cutoff. A tripped reset button means the water exceeded 170°F. This indicates a failing thermostat that requires professional repair.

How Do You Adjust the Temperature on a Tankless Water Heater?

Tankless water heaters have a digital temperature control panel on the front of the unit. Adjusting the temperature requires no tools and takes under 30 seconds. Press the up or down arrow buttons on the display until the screen shows your desired temperature. Most tankless units allow adjustments in 1°F increments. The change takes effect within minutes because tankless water heaters heat water on demand rather than storing it in a tank.

Set a tankless water heater to 120°F for general household use. Tankless units from Rheem, Rinnai, and Navien default to 120°F from the factory, unlike tank-style heaters that default to 140°F. If your tankless water heater has a remote control or Wi-Fi app, you can adjust the temperature from inside the house without accessing the unit directly.

What Are the Risks of Setting the Water Heater Temperature Too High or Too Low?

What Happens When the Water Heater Temperature Is Too High?

Water at 140°F causes a third-degree burn in 5 seconds. Water at 150°F causes a third-degree burn in 1.5 seconds. Children, elderly family members, and anyone with reduced sensation (diabetes, neuropathy) face the highest scald risk. The Consumer Product Safety Commission reports that approximately 3,800 injuries and 34 deaths occur each year in the U.S. from tap water scalding.

High temperatures also accelerate mineral buildup inside the heater tank and hot water pipes. San Antonio’s hard water from the Edwards Aquifer (15 to 20 grains per gallon) compounds this effect. Calcium and magnesium scale forms faster at higher temperatures, reducing heating efficiency and shortening the lifespan of the tank, heating elements, and anode rod.

What Happens When the Water Heater Temperature Is Too Low?

Water below 120°F creates conditions for Legionella bacteria to grow inside the heater tank. Legionella thrives between 77°F and 113°F. The bacteria become dormant above 120°F and die above 140°F. A tank held below 120°F for extended periods can harbor enough bacteria to pose a health risk when inhaled through steam or aerosolized water droplets from showers and faucets.

Low temperatures also mean insufficient hot water for dishwashers and washing machines. Older dishwashers without booster heaters need water at 130°F to 140°F for proper sanitization. Washing machines require water above 120°F to dissolve detergent effectively and kill bacteria on clothing and linens.

How Much Money Does Lowering the Water Heater Temperature Save?

Lowering the water heater temperature from 140°F to 120°F reduces water heating energy costs by 6 to 10%. The Department of Energy estimates this saves $36 to $61 per year in standby heat losses alone. Total savings across all hot water usage (showers, laundry, dishes) can exceed $400 per year.

Water heating accounts for approximately 18% of the average U.S. home’s energy bill. For every 10°F reduction in water temperature, energy consumption drops by 3 to 5%. San Antonio homeowners on CPS Energy service can calculate the impact directly: a household spending $200 per month on electricity uses roughly $36 per month on water heating. A 10% reduction saves $3 to $4 per month, or $36 to $48 per year.

Insulating the first 6 feet of hot water pipe leaving the heater with foam pipe insulation ($5 to $10 in materials) reduces standby heat loss further. Insulating the heater tank itself with a water heater blanket ($20 to $40) adds another 7 to 16% reduction in standby losses for older tanks without factory insulation.

How Does San Antonio Hard Water Affect Water Heater Temperature Settings?

San Antonio water from the Edwards Aquifer measures 15 to 20 grains per gallon of hardness. This mineral content accelerates scale buildup inside the heater tank, on heating elements, and inside hot water pipes. Scale forms faster at higher temperatures. A tank set to 140°F accumulates scale 2 to 3 times faster than a tank set to 120°F.

Scale buildup on an electric water heater’s heating element acts as insulation, forcing the element to work harder and longer to heat the same volume of water. This increases energy consumption and shortens the element’s lifespan from 10 to 15 years down to 6 to 8 years. On a gas water heater, scale settles on the bottom of the tank above the burner, reducing heat transfer efficiency and causing popping or rumbling sounds during heating cycles.

Two steps reduce the impact of hard water on your water heater. First, set the thermostat to 120°F to slow scale formation. Second, consider installing a NOVO-certified water softener to reduce mineral content before it reaches the heater. Flushing the heater tank once per year also removes accumulated sediment. Open the drain valve at the bottom of the tank and let water run into a bucket until it runs clear. This takes 5 to 10 minutes.

When Should You Call a Plumber Instead of Adjusting the Temperature Yourself?

5 situations require a plumber or appliance technician instead of a DIY temperature adjustment:

  1. Water temperature fluctuates despite a correct thermostat setting: A failing thermostat, a burned-out heating element, or a broken dip tube causes inconsistent temperatures. Diagnosis requires testing components with a multimeter.
  2. The high-limit reset button keeps tripping: A thermostat that overshoots the set temperature repeatedly is failing and needs replacement. The reset button is a safety device that cuts power when water exceeds 170°F.
  3. You smell a sulfur or rotten egg odor from the hot water: Bacteria reacting with the anode rod produce hydrogen sulfide gas. A plumber can flush the tank, replace the anode rod, or temporarily raise the temperature to 140°F for 24 hours to kill the bacteria.
  4. The water heater leaks from the tank, fittings, or temperature and pressure relief valve: Leaks indicate internal corrosion, excessive pressure, or a failing relief valve. None of these are DIY temperature adjustments. Water heater repair in San Antonio addresses these issues safely.
  5. The water heater is over 10 years old and has never been serviced: A 10-year-old tank with untreated hard water likely has significant sediment buildup. A plumber can flush the tank, inspect the anode rod, test the thermostat, and check the relief valve as part of a single maintenance visit.

Frequently Asked Questions About Water Heater Temperature Settings

What is the ideal water heater temperature?

The ideal water heater temperature is 120°F. This setting prevents scalding, kills harmful bacteria, slows mineral buildup, and reduces energy costs by 6 to 10% compared to the factory default of 140°F.

How do you adjust the temperature on a gas water heater?

Turn the temperature control dial on the gas valve near the bottom of the tank. The “Hot” or triangle symbol corresponds to approximately 120°F. Wait 3 hours and verify with a thermometer at the farthest faucet.

How do you adjust the temperature on an electric water heater?

Turn off power at the breaker. Remove the access panel(s) on the side of the tank. Adjust both the upper and lower thermostats to 120°F with a flathead screwdriver. Replace panels and restore power.

What temperature kills Legionella bacteria in a water heater?

Legionella becomes dormant above 120°F and dies above 140°F. The bacteria thrive between 77°F and 113°F. Setting the tank below 120°F for extended periods creates conditions for bacterial growth.

Can hard water damage a water heater?

Hard water deposits mineral scale on heating elements, inside the tank, and in hot water pipes. Scale forms faster at higher temperatures. San Antonio water at 15 to 20 grains per gallon shortens heater lifespan by 20 to 40% without a water softener or annual tank flushing.

How much does it cost to have a plumber adjust a water heater?

A plumber service call for water heater diagnosis and adjustment costs $75 to $150 in San Antonio. Thermostat replacement costs $100 to $250. Heating element replacement costs $100 to $300 for parts and labor.

Why Does the Right Water Heater Temperature Setting Matter for San Antonio Homes?

The right water heater temperature setting protects your family from scalding, prevents bacterial growth, reduces energy costs by 6 to 10%, and slows the mineral damage that San Antonio’s hard water causes to heating elements, tanks, and pipes. Setting the thermostat to 120°F addresses all 4 concerns in a single adjustment that takes under 5 minutes.

Gas water heaters have an external dial that requires no tools. Electric water heaters require turning off power and accessing the thermostat behind a panel. Tankless water heaters adjust via a digital display. In all 3 cases, verify the actual water temperature at the farthest faucet with a thermometer after waiting 3 hours. The dial setting and the actual output can differ by 10°F or more.

Anchor Plumbing Services provides same-day water heater repair and maintenance in San Antonio and surrounding Bexar County communities. Every job is performed by Texas-licensed plumbing technicians under Master Plumber oversight. We provide flat-rate written quotes before any work begins, so the price you see is the price you pay. Our team carries a 4.9-star rating across 1,500+ verified reviews and backs every job with a satisfaction guarantee. Call us today at 210-843-5800 or book online for water heater service.

Septic in San Antonio, TX

How Do Septic Tank Enzymes Work?

Commonly located underground, septic tanks are made to collect all household waste. Any grease, fat, and food particles that are washed down the kitchen drain will get into the septic tank. Chemical cleaners, toilet water, and human waste are also collected. At this point, the collected waste is treated to allow for easy disposal. Treatment occurs with a combination of bacteria and enzymes.

What Happens When Waste Reaches a Household Septic Tank?

Once waste reaches your household septic tank, it’s treated in two distinct phases. During the first phase, the bacteria in the tank will degrade organic waste. After this process occurs, dirt, pieces of plastic, and undigested organic matter will settle at the bottom and form a sludge. The liquid waste is then passed into a nearby drain field.

A drain field is a large system of sloped pipes that spread outward from the septic tank. If a property doesn’t have a drain field, septic tanks would overflow and cause runoff to get into your yard. The same issue occurs when there’s a blockage in the drain field that results in the wastewater no longer flowing properly.

What Are Enzymes?

Enzymes are proteins that bacteria secrete. These proteins are capable of breaking down very specific types of organic matter and are essential in the septic tank treatment process. Unlike bacteria, an enzyme isn’t a living thing. These proteins don’t reproduce or grow.

Think of enzymes as knives that are capable of cutting molecules into much smaller pieces that bacteria can handle. When there are a considerable amount of enzymes in a septic tank, the degradation of all organic waste is sped up, which is necessary to keep this waste from overflowing.

Enzymes Typically Present in Septic Systems

There are many different types of enzymes that are commonly found in septic systems. For instance, protease is an enzyme that breaks down blood, fecal matter, and any other protein-based waste. Amylase is capable of breaking down pasta, bread, and rice. An enzyme called lipase can manage oil, fats, and greases. Cellulose that’s created from paper-based items is broken down with the cellulase enzyme. If there are any plant materials in the waste, they degrade with the help of the xylanase enzyme.

The majority of these enzymes are naturally produced by bacteria. However, it’s also possible to place biological additives in your septic tank to bolster the bacteria count and improve the decomposition process.

How Enzymes Work in Septic Systems

Solid waste degradation in a septic tank system is possible because of the existence of millions of natural bacteria. Once enzymes have been produced by bacteria, they will be used as catalysts during anaerobic digestion, which is a process that involves breaking down organic matter. During this process, molecules are converted into nutrients.

How Enzymes in Septic Tanks are Affected

Septic tanks function properly when naturally occurring bacteria secretes enough enzymes to promote the decomposition of waste. However, there are several factors that can affect the efficiency of this process. For instance, using a large number of chemicals in a home can result in too many chemicals reaching the septic tank system. In this scenario, the helpful microbes can be eliminated by such chemicals as oil, bleach, chemical soaps, and acid.

Over time, the pressure on the septic tank system will increase since solid waste isn’t treated after it arrives. It’s possible for the sludge to build up to the point that backup issues occur in the home. When a septic tank overflows, unprocessed waste could flood the drain field. Enzymes and bacteria are particularly sensitive to the pH levels in your septic tank system. Along with toxic substances, the temperature can also impact enzyme activity and alter the pH levels until they’re outside the optimal range.

Chemicals are routinely used to degrease different parts that are found in a septic tank system. Drain cleaners that consist of inorganic compounds can clear clogged drains. Despite the advantages of using these chemicals, they can eliminate beneficial bacteria and may eventually cause corrosion in the septic tank.

Signs of a Malfunctioning Septic Tank Caused by Low Enzyme Concentration

When a septic tank malfunctions, the leaks that occur can result in foul odors being emitted inside and outside of the home. There are many different signs to be on the lookout for, which include standing water around the septic tank, gurgling sounds within your plumbing system, water and sewage being sent out from sinks and toilets, bright green grass surrounding the drain field, and algal blooms in any nearby water features.

Septic systems require regular maintenance to avoid these issues. While there should be enough enzymes in the septic tank to effectively degrade organic matter, the only way to be certain is by having the tank inspected. Responding quickly to potential issues in a septic system can reduce the number of repairs that are required and prevent potential illnesses.

How to Add Enzymes and Bacteria to Septic Tanks

Healthy septic tanks should have more than enough bacteria to treat wastewater and human waste. Along with obtaining maintenance, it’s possible to add more bacteria to the tank. In a healthy tank, too many bacteria can result in competition among bacterial populations, which eventually leads to some of the beneficial bacteria being eliminated. On the other hand, unhealthy septic systems may require more bacteria to restore healthy conditions.

Adding Septic Tank Enzymes

Enzyme additives are designed to stimulate bacteria that are present in septic tanks. If bacteria aren’t producing enzymes fast enough to aid in the decomposition process, it’s possible for enzymes to be added to your septic tank.

When added, enzymes can reduce the buildup of a damaging scum layer in the system. Once the scum layer develops, the fats, greases, and oils that collect on this layer will flow downstream into the remaining septic system components.

The issue with this process is that these substances aren’t meant to get downstream. When they do, the components in your septic system could become overloaded, which would worsen their performance and potentially reduce their lifespan.

Problems Caused by Adding Enzymes

While enzymes are capable of being added to a septic system to more effectively process waste, adding too many enzymes can keep the entire system from operating smoothly. Even if they help on a short-term basis, they might eventually cause components in septic tanks to run less efficiently. If a septic system failure occurs, the entire system might need to be replaced, and your property could require a professional cleanup.

If you find that the sinks in your home drain slowly or that water is backing up in your toilet, our team at [company_name] can deliver timely plumbing services. We’ll identify the source of the problem, give you an estimate, and complete the necessary repairs. Our plumbing services also cover drain cleaning, pipe repair, and toilet repair.

At [company_name], we offer a selection of water heating services, which include maintenance, repair, and installation of tankless water heaters. If your home is receiving hard water, we can install water softeners and water filtration systems that will deliver clean and fresh water supplies to your San Antonio, TX home. Call us today to schedule our service or request a free quote.

HVAC Repair San Antonio, TX

How Sump Pumps Work to Prevent Basements From Flooding

Basements and crawl spaces are often susceptible to flooding as groundwater can easily seep inside after heavy rains. A leak in your main water or sewer line or your sprinkler system can also quickly lead to flooding. Sump pumps work to lessen the risk of water damage and mold growth by capturing this water and pumping it back outside, and today we’re going to give you a full overview of exactly how they work to prevent your basement from flooding.

Understanding the Different Parts of a Sump Pump

Sump pumps have a number of different parts that work together so that the unit can draw water out of the basement or crawl space and pump it outside and away from the home. A sump pump is installed in or on top of a large plastic container known as a sump basin or sump pit. The sump pit is installed so that the top of it is right at the ground level and the bottom extends around 24 to 36 inches down into the ground.

The sump pump itself is either hardwired into the home’s electrical system or simply plugged into a nearby outlet to ensure that the unit has the electricity needed to power its small motor. Many sump pumps also come with a backup battery. While not essential, a backup battery is definitely a great feature as it will ensure that the sump pump can continue to run even if the power is out.

A float or other type of switch works to sense how much water is in the sump pit and will automatically trigger the unit to turn on once the water reaches a certain level. This triggers the motor to run and start spinning the unit’s impeller blades, which creates suction so that the water can be drawn up and out of the pit. Once out of the pit, the water then flows through a series of pipes that then lead out of the home.

Depending on how the system was set up, the outlet pipe may either empty out into the lawn or run toward a storm drain. Even though it is against building codes, you will also occasionally see sump pumps that are connected directly to the home’s sewage system.

How a Sump Pump Float Switch Works

Whenever lots of water is present, it naturally flows from the surrounding ground into the sump pit. Most sump pumps use some type of float switch that basically measures the water level and triggers the pump to turn on and off.

The most common type is a tethered float switch, which is a hollow floating element that has a steel ball inside it. When the water rises and the switch begins to float, the steel ball inside the float shifts and activates an electronic switch. This closes the electrical circuit so that electricity starts to flow and the sump begins to run. Once the water level recedes past a certain point, the steel ball again moves so that the switch deactivates opening the circuit and shutting off power to the pump.

There are also sump pumps that instead use a vertical float switch that is connected to a rod and lever arm and works somewhat similarly to a toilet float. When this type of switch starts to float, it pushes against the rod, which raises the lever arm and activates the switch so that the pump starts running. This type of float switch is generally more reliable than a tethered float switch and is best suited for use in smaller sump pits.

You can also find sump pumps that don’t use a float and instead use either a diaphragm switch or an electronic switch, and these are by far the most reliable. A diaphragm switch works by sensing pressure. When the sump pit starts to fill, the water eventually puts enough pressure on the switch that it then activates to turn on the pump.

Electronic switches are even more advanced and use electrical probes to sense the presence of water in the sump pit. The unit constantly sends a small electrical current through the probes. An internal sensor in the switch constantly measures the electrical resistance in the probes. When water is present in the sump pit, the electrical resistance changes. Once the resistance passes a set level, the switch then activates to turn the pump on. The sensor then continues measuring the resistance and will shut the pump off whenever it is back to normal.

Submersible vs. Pedestal Sump Pumps

Sump pumps can be either submersible or pedestal-style units. A submersible sump pump sits at the bottom of the sump pit, whereas pedestal pumps sit on top of the sump pit and have a long pole that sticks down into the pit. Both types of units use an impeller to create suction and draw out the water from the pit.

With a submersible pump, the motor and impeller are located within the body of the pump itself. A pedestal sump pump has its motor at the top of the basin, while the impeller is located at the end of the pole inside the basin.

Submersible pumps are typically a bit more powerful as they tend to have slightly larger motors than pedestal units. This makes them much better suited for places that are more prone to flooding or when the water needs to be pumped much further vertically or horizontally.

Pedestal pumps, on the other hand, tend to be a bit cheaper and easier to maintain since they don’t sit inside the pit. They can also sometimes last longer since there is no chance that water can get inside the unit’s motor, which could happen if the waterproof coating on a submersible unit gets damaged. However, pedestal pumps are also much louder than submersible units. This is because the water that surrounds a submersible pump works to muffle the noise of the motor.

The other issue with pedestal pumps is that they can usually only ever run for a few hours at a time. Most submersible pumps can run for 24 hours a day with no issue as the water helps to cool the motor and prevent the unit from overheating. Pedestal pumps have no way to keep the motor cool, which means they could overheat if they run for too long.

Determining which type of sump pump is best for your home isn’t always easy as it depends on a number of different factors. This is why we would always recommend consulting with a professional plumber to ensure that you get exactly what you need. At [company_name], our team has years of experience installing, maintaining, and repairing sump pumps and can help ensure you get the right unit and that it works correctly. As a full-service plumbing contractor, we also install and repair water heaters, garbage disposals, water filtration systems, and all types of kitchen and bathroom plumbing fixtures. If you need drain cleaning or any type of sewer, water, or gas line services, we can help with that as well. Give us a call today if you have any questions or need any plumbing service in the San Antonio area.

Limescale in San Antonio, TX

3 Ways to Prevent Limescale in Your Home

Does your home have limescale? Limescale is a hard, chalky deposit that is made from calcium and carbonate ions. This stubborn substance is a problem found around common water spots in homes, such as sinks, taps, bathroom tiles, toilet bowls, and washing machines.

Limescale isn’t just unappealing to the eye, it is hard to remove. Even more, limescale can destroy appliances, lead to faulty plumbing systems, and irritate the skin. The good news is that there are certain steps you can take to prevent limescale from occurring in your home. Read on to learn more.

1. Regularly Clean Your Appliances

One of the easiest things you can do to prevent limescale is to regularly clean your appliances. For this reason, it’s important to wipe all wet fittings after every use. In particular, you should focus on wiping down areas where water is most likely to sit. This includes showers, sinks, and baths.

2. Water Softener

Another effective option to prevent limescale is to invest in a water softener. Water softeners use ion exchange to remove calcium and minerals from the water supply, turning hard water into soft water. This means that you will have fewer impurities in your water supply, which can minimize the buildup of limescale.

3. DIY Limescale Remover

If you’re looking for a DIY method, homeowners can choose to make a DIY limescale remover using one part water and one part white vinegar. You can put your DIY mix into a spray bottle and spray the mixture on fixtures that present limescale. Or, you can soak a clean towel in the mixture and wrap it around any fixtures that have limescale on them.

It’s a good idea to let the solution sit for at least 10 minutes before wiping it away. If the limescale is particularly stubborn, you may want to consider leaving the mixture on overnight for the best results.

At Anchor Plumbing & Services, we want to help make your home feel comfortable again. We offer
services for Plumbing, water heaters, water softeners, and drains cleaning. Give us a call today for for your San Antonio, plumbing needs!