Why Your Toilet Drains Slowly: 6 Causes and How to Fix Each One in 2026
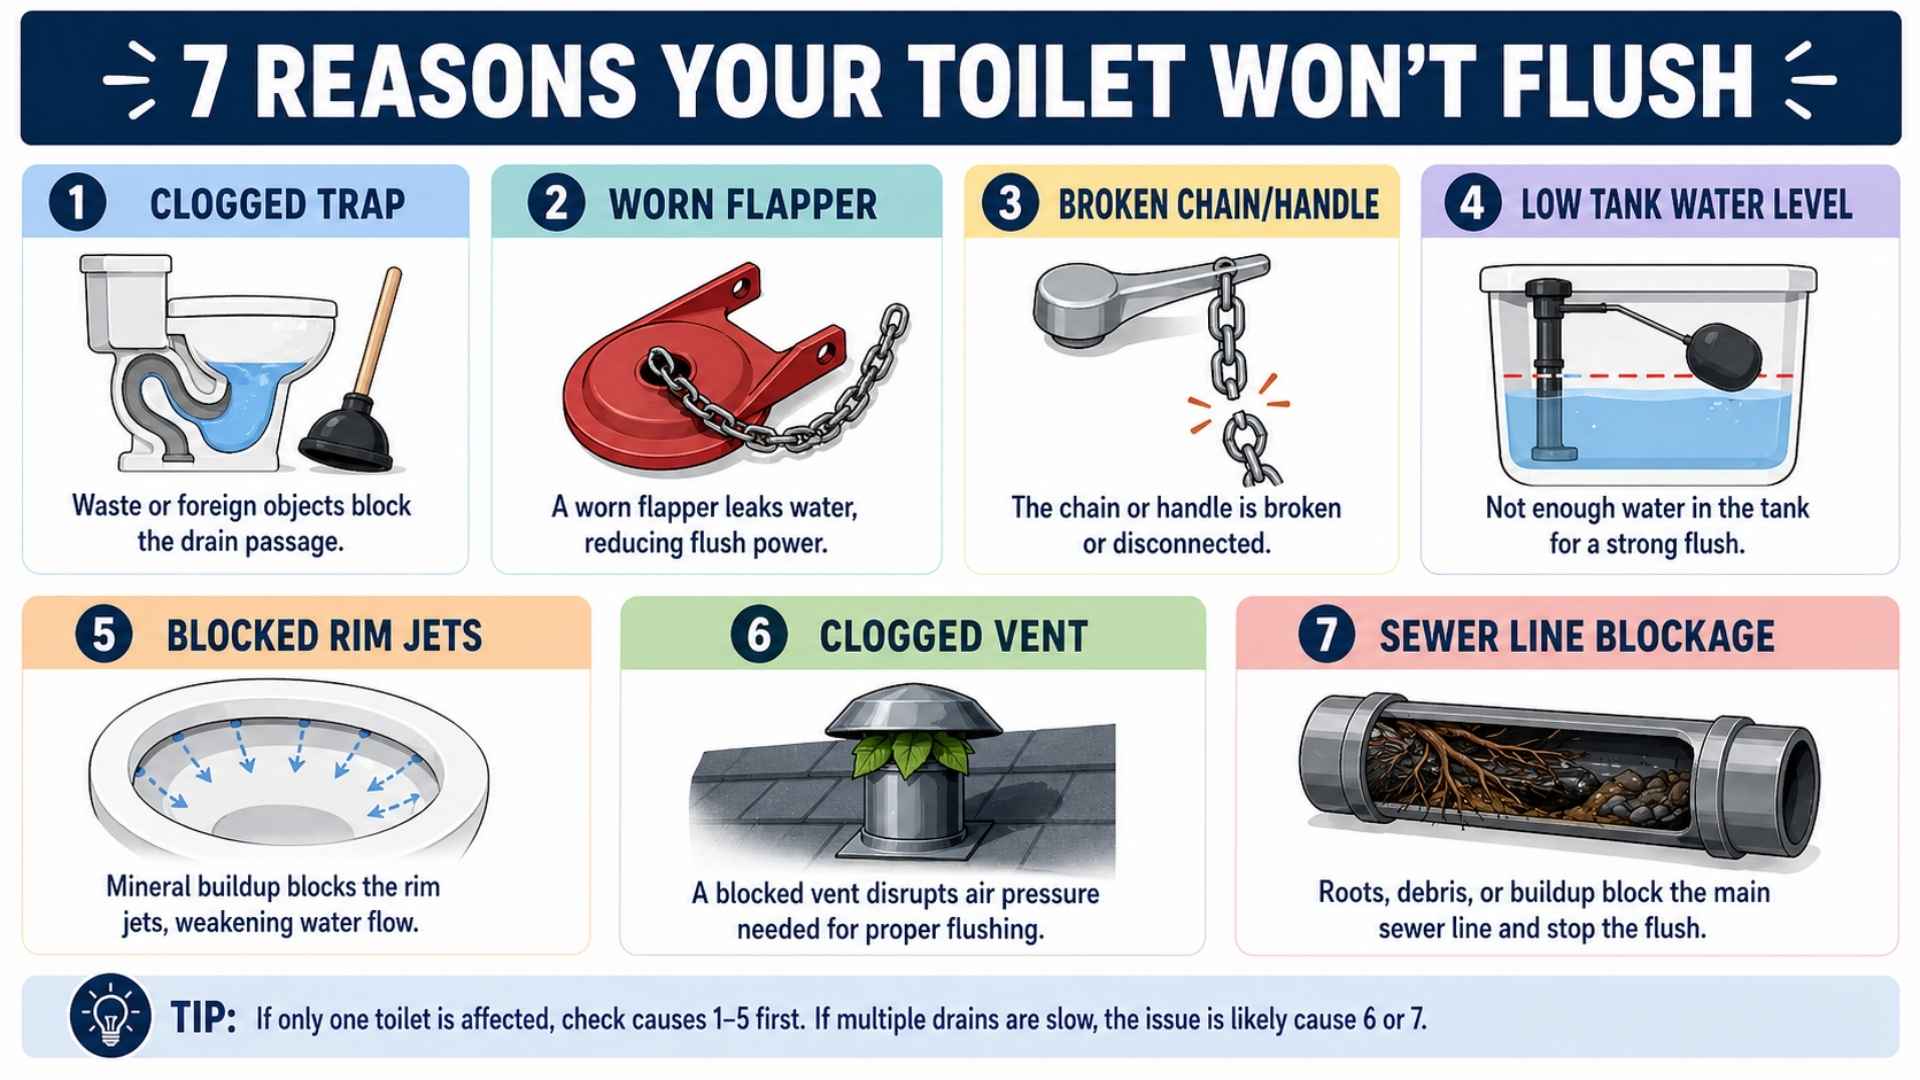
A slow draining toilet is caused by a partial blockage or flow restriction in the drain system. The 6 most common causes are a partial clog in the trapway, mineral-blocked rim jets, low water level in the tank, a blocked plumbing vent, a sewer line obstruction, and a worn or