News & Media

Septic in San Antonio, TX

How Do Septic Tank Enzymes Work?

Commonly located underground, septic tanks are made to collect all household waste. Any grease, fat, and food particles that are washed down the kitchen drain will get into the septic tank. Chemical cleaners, toilet water, and human waste are also collected. At this point, the collected waste is treated to allow for easy disposal. Treatment occurs with a combination of bacteria and enzymes. What Happens When Waste Reaches a Household Septic Tank? Once waste reaches your household septic tank, it’s treated in two distinct phases. During the first phase, the bacteria in the tank will degrade organic waste. After this process occurs, dirt, pieces of plastic, and undigested organic matter will settle at the bottom and form a sludge. The liquid waste is then passed into a nearby drain field. A drain field is a large system of sloped pipes that spread outward from the septic tank. If a property doesn’t have a drain field, septic tanks would overflow and cause runoff to get into your yard. The same issue occurs when there’s a blockage in the drain field that results in the wastewater no longer flowing properly. What Are Enzymes? Enzymes are proteins that bacteria secrete. These proteins are capable of breaking down very specific types of organic matter and are essential in the septic tank treatment process. Unlike bacteria, an enzyme isn’t a living thing. These proteins don’t reproduce or grow. Think of enzymes as knives that are capable of cutting molecules into much smaller pieces that bacteria can handle. When there are a considerable amount of enzymes in a septic tank, the degradation of all organic waste is sped up, which is necessary to keep this waste from overflowing. Enzymes Typically Present in Septic Systems There are many different types of enzymes that are commonly found in septic systems. For instance, protease is an enzyme that breaks down blood, fecal matter, and any other protein-based waste. Amylase is capable of breaking down pasta, bread, and rice. An enzyme called lipase can manage oil, fats, and greases. Cellulose that’s created from paper-based items is broken down with the cellulase enzyme. If there are any plant materials in the waste, they degrade with the help of the xylanase enzyme. The majority of these enzymes are naturally produced by bacteria. However, it’s also possible to place biological additives in your septic tank to bolster the bacteria count and improve the decomposition process. How Enzymes Work in Septic Systems Solid waste degradation in a septic tank system is possible because of the existence of millions of natural bacteria. Once enzymes have been produced by bacteria, they will be used as catalysts during anaerobic digestion, which is a process that involves breaking down organic matter. During this process, molecules are converted into nutrients. How Enzymes in Septic Tanks are Affected Septic tanks function properly when naturally occurring bacteria secretes enough enzymes to promote the decomposition of waste. However, there are several factors that can affect the efficiency of this process. For instance, using a large number of chemicals in a home can result in too many chemicals reaching the septic tank system. In this scenario, the helpful microbes can be eliminated by such chemicals as oil, bleach, chemical soaps, and acid. Over time, the pressure on the septic tank system will increase since solid waste isn’t treated after it arrives. It’s possible for the sludge to build up to the point that backup issues occur in the home. When a septic tank overflows, unprocessed waste could flood the drain field. Enzymes and bacteria are particularly sensitive to the pH levels in your septic tank system. Along with toxic substances, the temperature can also impact enzyme activity and alter the pH levels until they’re outside the optimal range. Chemicals are routinely used to degrease different parts that are found in a septic tank system. Drain cleaners that consist of inorganic compounds can clear clogged drains. Despite the advantages of using these chemicals, they can eliminate beneficial bacteria and may eventually cause corrosion in the septic tank. Signs of a Malfunctioning Septic Tank Caused by Low Enzyme Concentration When a septic tank malfunctions, the leaks that occur can result in foul odors being emitted inside and outside of the home. There are many different signs to be on the lookout for, which include standing water around the septic tank, gurgling sounds within your plumbing system, water and sewage being sent out from sinks and toilets, bright green grass surrounding the drain field, and algal blooms in any nearby water features. Septic systems require regular maintenance to avoid these issues. While there should be enough enzymes in the septic tank to effectively degrade organic matter, the only way to be certain is by having the tank inspected. Responding quickly to potential issues in a septic system can reduce the number of repairs that are required and prevent potential illnesses. How to Add Enzymes and Bacteria to Septic Tanks Healthy septic tanks should have more than enough bacteria to treat wastewater and human waste. Along with obtaining maintenance, it’s possible to add more bacteria to the tank. In a healthy tank, too many bacteria can result in competition among bacterial populations, which eventually leads to some of the beneficial bacteria being eliminated. On the other hand, unhealthy septic systems may require more bacteria to restore healthy conditions. Adding Septic Tank Enzymes Enzyme additives are designed to stimulate bacteria that are present in septic tanks. If bacteria aren’t producing enzymes fast enough to aid in the decomposition process, it’s possible for enzymes to be added to your septic tank. When added, enzymes can reduce the buildup of a damaging scum layer in the system. Once the scum layer develops, the fats, greases, and oils that collect on this layer will flow downstream into the remaining septic system components. The issue with this process is that these substances aren’t meant to get downstream. When they do, the components in your septic system could become overloaded, which would

HVAC Repair San Antonio, TX

How Sump Pumps Work to Prevent Basements From Flooding

Basements and crawl spaces are often susceptible to flooding as groundwater can easily seep inside after heavy rains. A leak in your main water or sewer line or your sprinkler system can also quickly lead to flooding. Sump pumps work to lessen the risk of water damage and mold growth by capturing this water and pumping it back outside, and today we’re going to give you a full overview of exactly how they work to prevent your basement from flooding. Understanding the Different Parts of a Sump Pump Sump pumps have a number of different parts that work together so that the unit can draw water out of the basement or crawl space and pump it outside and away from the home. A sump pump is installed in or on top of a large plastic container known as a sump basin or sump pit. The sump pit is installed so that the top of it is right at the ground level and the bottom extends around 24 to 36 inches down into the ground. The sump pump itself is either hardwired into the home’s electrical system or simply plugged into a nearby outlet to ensure that the unit has the electricity needed to power its small motor. Many sump pumps also come with a backup battery. While not essential, a backup battery is definitely a great feature as it will ensure that the sump pump can continue to run even if the power is out. A float or other type of switch works to sense how much water is in the sump pit and will automatically trigger the unit to turn on once the water reaches a certain level. This triggers the motor to run and start spinning the unit’s impeller blades, which creates suction so that the water can be drawn up and out of the pit. Once out of the pit, the water then flows through a series of pipes that then lead out of the home. Depending on how the system was set up, the outlet pipe may either empty out into the lawn or run toward a storm drain. Even though it is against building codes, you will also occasionally see sump pumps that are connected directly to the home’s sewage system. How a Sump Pump Float Switch Works Whenever lots of water is present, it naturally flows from the surrounding ground into the sump pit. Most sump pumps use some type of float switch that basically measures the water level and triggers the pump to turn on and off. The most common type is a tethered float switch, which is a hollow floating element that has a steel ball inside it. When the water rises and the switch begins to float, the steel ball inside the float shifts and activates an electronic switch. This closes the electrical circuit so that electricity starts to flow and the sump begins to run. Once the water level recedes past a certain point, the steel ball again moves so that the switch deactivates opening the circuit and shutting off power to the pump. There are also sump pumps that instead use a vertical float switch that is connected to a rod and lever arm and works somewhat similarly to a toilet float. When this type of switch starts to float, it pushes against the rod, which raises the lever arm and activates the switch so that the pump starts running. This type of float switch is generally more reliable than a tethered float switch and is best suited for use in smaller sump pits. You can also find sump pumps that don’t use a float and instead use either a diaphragm switch or an electronic switch, and these are by far the most reliable. A diaphragm switch works by sensing pressure. When the sump pit starts to fill, the water eventually puts enough pressure on the switch that it then activates to turn on the pump. Electronic switches are even more advanced and use electrical probes to sense the presence of water in the sump pit. The unit constantly sends a small electrical current through the probes. An internal sensor in the switch constantly measures the electrical resistance in the probes. When water is present in the sump pit, the electrical resistance changes. Once the resistance passes a set level, the switch then activates to turn the pump on. The sensor then continues measuring the resistance and will shut the pump off whenever it is back to normal. Submersible vs. Pedestal Sump Pumps Sump pumps can be either submersible or pedestal-style units. A submersible sump pump sits at the bottom of the sump pit, whereas pedestal pumps sit on top of the sump pit and have a long pole that sticks down into the pit. Both types of units use an impeller to create suction and draw out the water from the pit. With a submersible pump, the motor and impeller are located within the body of the pump itself. A pedestal sump pump has its motor at the top of the basin, while the impeller is located at the end of the pole inside the basin. Submersible pumps are typically a bit more powerful as they tend to have slightly larger motors than pedestal units. This makes them much better suited for places that are more prone to flooding or when the water needs to be pumped much further vertically or horizontally. Pedestal pumps, on the other hand, tend to be a bit cheaper and easier to maintain since they don’t sit inside the pit. They can also sometimes last longer since there is no chance that water can get inside the unit’s motor, which could happen if the waterproof coating on a submersible unit gets damaged. However, pedestal pumps are also much louder than submersible units. This is because the water that surrounds a submersible pump works to muffle the noise of the motor. The other issue with pedestal pumps is that they can usually only

Septic System in San Antonio, TX

What to Know About Septic Tank Inspection

Your septic tank is an essential part of your home function. Not connected to a municipal sewer system, these underground tanks are designed to hold and treat wastewater that is produced by you in your home. Septic tanks allow for the separation of solid and liquid waste, which is sent to a drain field for treatment and disposal. By providing a safe, efficient way to dispose of wastewater and other organic matter, your septic tank plays a vital role in protecting the surrounding environment by preventing contamination of both ground and surface water. Care Of Your Septic System Performing regular care, inspection, and maintenance on your septic system will ensure that it functions as it should to keep your home and surrounding property safe and sanitary. Regular Inspections Your septic tank must be inspected and pumped out by a professional every three to five years, depending on the size of your tank and the number of people using it in your home. This helps to remove excess accumulated solids and prevent your tank from overflowing into your drain field. Being Mindful Of Additions to Your System Certain items such as cooking and industrial oils, grease, non-biodegradable items, baby wipes, and feminine hygiene products should never be disposed of or flushed into your septic system, as they can cause damage to vital system components and clog up your system. Avoiding Heavy Traffic on the Drain Field Your drain field is an area where treated wastewater is disposed of. Driving heavy construction traffic, utility vehicles, and cars over this area can compact the soil and gravel that was laid to filter water, damaging both piping and preventing water from flowing freely within your system. This leads to costly repairs and reconstruction of the area to restore your system once more. Conserving Water As you commit to using water efficiently in your home, you’ll reduce the amount of water and waste that needs to be treated by your septic system. This will extend the life of your system and keep your drain field from becoming over-saturated. Checking For Leaks and Issues Leaks and issues with your plumbing and septic system should be addressed as soon as possible to prevent damage to your home, costly repairs, and even health consequences from coming in contact with both sewage and fumes produced by septic waste. What Does A Septic Inspection Entail? Septic systems, when properly maintained, are designed to last around 25 years, but that doesn’t mean that they will always function perfectly. Having inspections performed every three to five years will optimize system function and keep your repair bills at a minimum. Getting the help of a trusted septic professional to help you evaluate your system is a critical component in making sure your system continues to work for you. Here are some things you can expect to experience with a septic inspection. Pre-Inspection As you connect with a septic professional, they may ask you questions about your system prior to visiting your property in order to get an accurate picture of what may need to be done. These questions will relate to: Whether the system has been pumped Who has worked on the system Prior damage and repairs Location of the system Septic system map Chances are, if your system has been serviced before, your technician likely has a record of services performed as well as a general layout. Having installation and other treatment information available will give even more information to your service professional that will be of value when it comes to caring for your system properly. On-Site Inspection Your technician will then come out to perform a visual inspection of your septic system. They’ll likely perform a flow test to see if your sanitary pipe delivers liquid efficiently to the system. A properly functioning system will use water from this flow test to force water into the leach field. A lack of water during this test indicates that there may be a plumbing or sanitary line issue within your system. Finding the source of the clog involves going through your home and testing each water source. Although this is the most tedious part of the inspection, it is also one of the most important, for it gives a thorough picture of whether your system is functioning properly or not. Next, your technician will evaluate the tank itself, as well as any accumulated layers of sludge, effluent, scum, and solids. After measuring each of these components, your technician will determine if your tank is sitting at appropriate levels of volume, leading to an evaluation of the leach field and its effectiveness. A visual examination of the leach field will quickly reveal if your area is saturated, flowing properly, and draining well. Wet, soggy areas and a persistent smell of sewage are red flags that your field is compromised, and further inspection will be necessary to restore function. Types of Septic Inspections While the above-described inspection is one of the more comprehensive ways of testing the various parts of your septic system, there are a number of options you have for evaluating your system. A visual-only inspection is something that a home inspector performs prior to the acquisition or sale of a property. The inspector will conduct a visual assessment of your tank as well as a loading and dye test. Level 1 inspections involve opening the cover of the tank and conducting a more thorough assessment of effluent screens and pipes leading to and from the tank. In some states, pumping the tank may be necessary to ensure that there are no structural deficiencies present that could compromise tank function. Level 2 inspections involve inspection of the layers of scum and sludge, as well as checking the tank for leaks and cracks that may eventually need repair. Level 3 inspections are known as standard inspections, they are one of the most thorough evaluations of both tank and system, and they provide you with the most information needed to make an informed

Frozen Plumbing in San Antonio, TX

Protecting Your Plumbing From Winter Weather

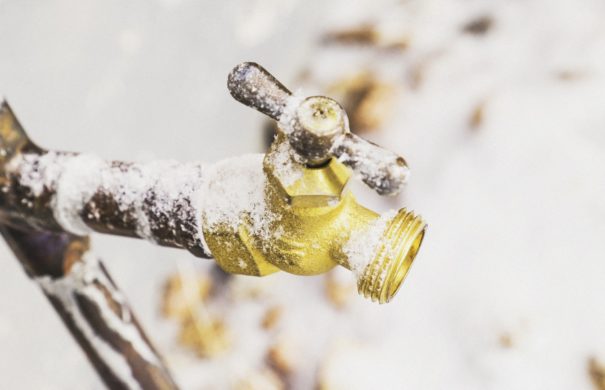
Depending on where you live, the cold winter weather may bring snow, ice, and freezing temperatures. Even if you live in an area with relatively mild winters, there are still some things you need to do to protect your home from the elements during cold weather. Ensuring that gutters and your roof are ready is important, but you also want to take steps to protect your plumbing. The following covers several things you can do to ensure that you don’t have to deal with frozen pipes and other plumbing issues come winter. Let Your Faucets Trickle You would be surprised how just running a trickle of water through your pipes can help prevent them from freezing in harsh winter conditions. Keep in mind that only a small amount of water is needed to do this. With water moving through your pipes, ice cannot form and burst one. Keep the Heat Flowing No one likes to live in a cold home, and pipes don’t readily accept chilly temperatures. To help prevent your pipes from freezing, you’ll want to keep your home’s thermostat adjusted to at least 55 degrees. Keep in mind this is equally important even if you go on vacation or are away from your home for long periods of time. The warmer it is in your home, the less chance there is to be surprised by a burst pipe. A programmable or smart thermostat can be an easy way to keep temperatures steady in your residence. With a connected smart thermostat, you can even control your settings when you’re outside your home. That means if you leave for vacation without double-checking the thermostat you can simply use your phone to adjust it. Insulate Those Pipes If your home has pipes in the basement, attic, or crawl space and they are not insulated, you’ll want to make sure they get insulation before the temperature becomes too cold. Pipes that are in chilly areas inside your home need to be adequately wrapped in insulation, pipe sleeves, or electrical heat cables. At [company_name], we can assist you with locating the pipes that need to be insulated, and we can install whatever type of insulation might be necessary to keep your pipes from bursting. It is easier to have professionals do this type of work because the pipes may be located in hard-to-reach or hard-to-spot areas. Keep Your Cabinets Open in the Bathrooms and Kitchen In order for heat to adequately flow through to the bathroom and kitchen pipes, you may need to keep your cabinets open. This allows the heat in the surrounding area to reach the pipes that are located inside the cabinets. Allowing warm air into the cabinets is especially important for those that contain pipes located near outside-facing walls. Keep Your Crawl Space Free From the Cold If you have a crawl space instead of a basement or a combined crawl space/basement area, you’ll want to try to cover the outside walls of the crawl space with some type of foam board to help keep the chilly temperatures out. Foam board is relatively inexpensive, and it’s easy to cut to fit walls of all sizes. If you are uncomfortable with this task, however, you can reach out for professional help. Remove Garden Hoses From Outside While you are taking steps to protect your indoor plumbing, you also want to take time to ensure that any outdoor pipes and spigots are protected. After all, they are directly exposed to the winter weather. Be sure to detach any hoses from outdoor spigots. If a hose freezes, ice can back up and make its way into your pipes. This can cause the pipe to freeze and burst, leaving you with plumbing repairs and property damage to take care of. If you want added protection for outdoor plumbing, you may also want to look into purchasing covers for your faucets. You can purchase these at any home improvement store and install them yourself, or you can have a plumber from [company_name] install them. Keep the Garage Door Closed Keeping the garage door open in the wintertime can allow frigid air to get inside, and that air can freeze any or all pipes that may be in your garage area. It is best to keep your garage door closed tightly in the wintertime to keep the space warm. If you are in an especially cold area, investing in a garage heater may be a wise decision to protect the plumbing and other property in your garage. Make Sure Excess Cold Air Isn’t Getting Into Your Home Many homes have cracks and gaps around windows and doors that can let cold air in and warm air out. Taking steps to seal these areas with caulk and weatherstripping will go a long way toward protecting your plumbing and keeping you more comfortable. Sealing leaks also helps improve your energy efficiency, which can lead to lower monthly utility bills. In addition to checking around windows and doors, you also want to make sure that exposed areas such as your attic are insulated properly. Make Use of Space Heaters In some areas where vulnerable pipes are located, it may be necessary to run a space heater to help guard the pipes against freezing. The heater can provide just enough warmth to keep your pipes from freezing. When using space heaters, however, it’s important to never leave them unattended as they can present a fire hazard. Know Where Your Shut-Off Valves Are Do you know where your main shut-off valve for your water is? If not, you are not alone. Many people don’t know where to locate this valve or even what it looks like. However, knowing the location of this important device is very important because it can help you reduce property damage in case of a burst pipe or other plumbing emergency. If your home has a basement, the valve will typically be located there along an outside wall where the municipal water line enters your

Limescale in San Antonio, TX

3 Ways to Prevent Limescale in Your Home

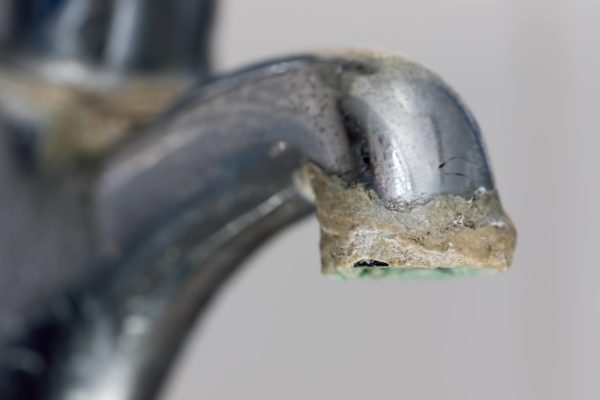
Does your home have limescale? Limescale is a hard, chalky deposit that is made from calcium and carbonate ions. This stubborn substance is a problem found around common water spots in homes, such as sinks, taps, bathroom tiles, toilet bowls, and washing machines. Limescale isn’t just unappealing to the eye, it is hard to remove. Even more, limescale can destroy appliances, lead to faulty plumbing systems, and irritate the skin. The good news is that there are certain steps you can take to prevent limescale from occurring in your home. Read on to learn more. 1. Regularly Clean Your Appliances One of the easiest things you can do to prevent limescale is to regularly clean your appliances. For this reason, it’s important to wipe all wet fittings after every use. In particular, you should focus on wiping down areas where water is most likely to sit. This includes showers, sinks, and baths. 2. Water Softener Another effective option to prevent limescale is to invest in a water softener. Water softeners use ion exchange to remove calcium and minerals from the water supply, turning hard water into soft water. This means that you will have fewer impurities in your water supply, which can minimize the buildup of limescale. 3. DIY Limescale Remover If you’re looking for a DIY method, homeowners can choose to make a DIY limescale remover using one part water and one part white vinegar. You can put your DIY mix into a spray bottle and spray the mixture on fixtures that present limescale. Or, you can soak a clean towel in the mixture and wrap it around any fixtures that have limescale on them. It’s a good idea to let the solution sit for at least 10 minutes before wiping it away. If the limescale is particularly stubborn, you may want to consider leaving the mixture on overnight for the best results. At Anchor Plumbing & Services, we want to help make your home feel comfortable again. We offer services for Plumbing, water heaters, water softeners, and drains cleaning. Give us a call today for for your San Antonio, plumbing needs!

Dishwasher

What Should You Do When Your Dishwasher Isn’t Draining?

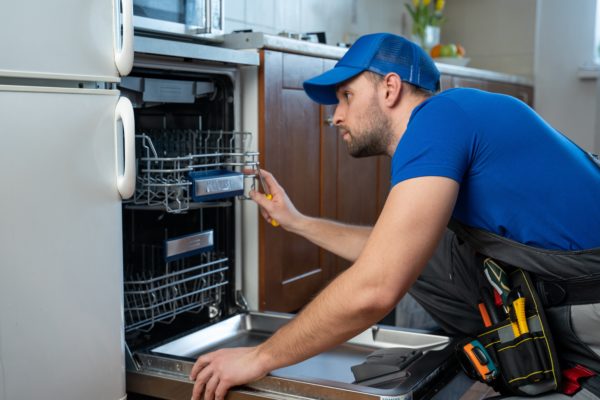
Dishwashers are extremely convenient and also use much less water than washing dishes by hand. Still, you often won’t realize just how much easier they make your life until your dishwasher breaks down and you have to start doing your dishes by hand again. One of the most common dishwasher problems you may encounter is when the unit stops draining for some reason. If you ever find yourself in this situation, here are all of the steps that you should take to try to get it to drain again. Try to Run the Dishwasher Again The most common reason that you will open up your dishwasher and find it full of water is because it was shut off before it completed its full cycle. If you turn the unit off while it is still full of water, the drain pump won’t run, and the water will remain until the dishwasher is turned back on. This is always the very first thing you should check. All you need to do is turn it on and set it to run. If it is still full of water once it finishes the cycle, then you will need to move on to the next steps. Turn On the Garbage Disposal Dishwashers are always installed so that the drain hose connects to the main drain pipe underneath your kitchen sink. If you have a garbage disposal, the dishwasher will drain directly into it instead. When the garbage disposal gets clogged with food and debris, it will prevent the dishwasher from being able to drain. To check if this is the case, turn on the cold water and attempt to run the garbage disposal for 30 seconds or so. You will then need to run your dishwasher again to see if it will drain now that you know the garbage disposal is clear. Remove Any Standing Water and Check for Obstructions If the previous two steps weren’t any help, you will now need to remove all of the water. This allows you to inspect for any clogs or obstructions around the drain valve. Before starting, you should always put towels on the ground in front of the dishwasher to catch any water that may spill out. You will then need to use a ladle or cup to scoop out as much water as you can, and then soak up any remaining water with a towel. Once the dishwasher is no longer full of water, you can then check to make sure the drain valve is clog-free and working properly. The valve should be located near the back corner of the unit. To check that the valve is working properly, gently push down on it. It should move freely when you press on it. If not, then the valve is stuck, and you will likely need to hire a plumber to determine why and see if they can repair it. Clean the Filter You should also make sure that your dishwasher’s filter isn’t full of food particles or clogged. Most people are unaware that you are supposed to clean a dishwasher filter regularly, and many people don’t know that their dishwasher even has a filter. The filter works to prevent food particles from potentially clogging the drain line. However, if the filter gets too dirty, it can prevent the dishwasher from draining or cause it to drain much more slowly. Most dishwashers have a cylindrical, cup-shaped filter at the bottom. Some units also have a screen on the bottom near the filter that can be removed and cleaned. If you’re not sure what the filter looks like or where it is, check your owner’s manual. This will also tell your how to remove and clean it. After removing the filter, soak it in vinegar for around 30 minutes to soften up any gunk stuck to it. You can then gently scrub it inside and out using soap and either a bristled brush or scouring pad. Once it is fully clean, make sure to rinse it well before you put it back in to ensure it isn’t full of dish soap. Make Sure the Drain Hose Isn’t Clogged or Kinked Your dishwasher uses a soft, flexible drain hose that runs from the unit to your sink drain. This hose can easily become kinked and prevent the dishwasher from draining. If the hose is kinked, you should gently straighten it out as best as you can. You should also unhook the hose from the sink drain so you can make sure it isn’t clogged. You can check for and remove clogs by sticking a wire hanger into the hose. When you reconnect the hose, you also need to make sure that the connection to the drain has an airtight seal. If the seal is even slightly loose, it can also prevent the dishwasher from draining or cause it to leak underneath your sink. Clean the Dishwasher With Baking Soda and Vinegar Another effective solution to drainage issues is to use baking soda and vinegar to fully clean the dishwasher. This works by helping to break up any clogs that could be preventing it from draining. If you notice that there is standing water in your dishwasher after it runs, mix together approximately one cup of baking soda and one cup of white vinegar. Pour this mixture into the water inside the dishwasher and wait around 30 minutes. After letting this mixture sit, the dishwasher will often become clear enough that it will start draining on its own. In this case, you should turn the unit on to the rinse cycle and let it run. The vinegar and baking soda should help to loosen up any clogs enough that the dishwasher can then flush them out and drain properly. Run the Dishwasher Again and Listen Another thing you should always do if your dishwasher won’t drain is to run it and listen for anything unusual. If everything sounds as it should, this likely means that it is clogged. However,

shower hub

7 Signs That It’s Time to Replace Your Plumbing Fixtures

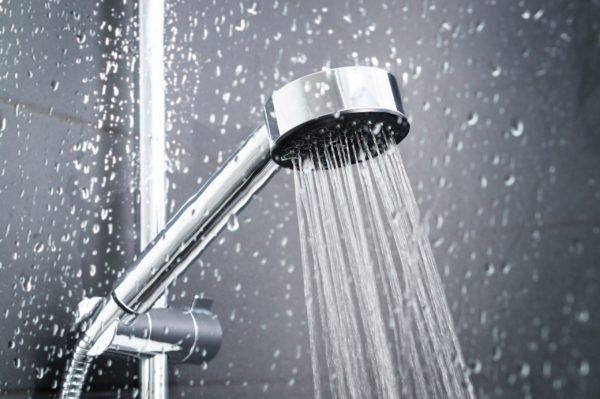
Old, leaky plumbing fixtures are an eyesore. Surprisingly, they can also be harmful to your health. Whether you plan on selling your San Antonio, Texas home or intend to live in it for quite a while, upgrading your plumbing fixtures will make your living environment safer, more visually appealing, and far more pleasant to be in. Here are seven solid reasons to make having new plumbing fixtures installed your next home improvement project. 1. New Fixtures Will Make Your Home More Marketable When selling your home, you should know that bathrooms and kitchens are among the very first places that prospective buyers tour. After all, these are the rooms that building residents are virtually guaranteed to use every day. When bathrooms and kitchens have rusty and outdated plumbing fixtures, homes are far less likely to attract motivated buyers or command the highest possible prices. If you plan on listing your home soon, having upgraded plumbing fixtures installed is an easy and affordable way to make the best possible impression on your target market. Even if you don’t intend to sell, having new plumbing fixtures put in will keep your house on par with current market standards. This way, if you do decide to sell at some point, you won’t have as much to take care of. 2. You Currently Have Standard Fixtures Installed Plumbing fixtures have come quite a long way in the past several years. The latest options in plumbing fixtures are sleek and highly refined. They improve bathroom aesthetics, limit water waste, and provide greater ease of use. There are also a number of options in low-touch faucets that limit the likelihood of illness by preventing the transfer of germs. You can find options made from materials that have inherent antimicrobial properties and upgrades that seamlessly coordinate with other indoor elements such as your wall sconces, towel racks, or cabinet hardware among other things. 3. Water Pressure Is Unsteady Many of the best reasons for upgrading home plumbing fixtures are functional and practical. Although having new plumbing fixtures is sure to make your kitchen and your bathrooms look more modern and appealing, it will also make many essential home features perform better. For instance, if you experience dramatic changes in water pressure while taking a shower, replacing your old shower heads and faucets can enhance your daily self-care routine. Aging fixtures are often filled with mineral deposits and other build-ups. Although these accumulations can be eliminated by removing and soaking their clogged components, with aging fixtures, replacement tends to be the most effective choice. 4. You’ve Got a Leak That Can’t Be Fixed The naturally high levels of humidity in kitchens and bathrooms can take a toll on plumbing fixtures. When hard water is added into the picture, plumbing fixtures can look worn and aged as they begin to visibly degrade. One sure sign that it’s time to change your plumbing fixtures is the development of leaks that are impossible to fix. Constantly dripping faucets can be a nightmare to live with. Attempting to asleep while hearing loud dripping and splashing sounds is downright maddening. A constant drip can also increase your water bill because of the constant water waste. Leaky fixtures that cannot be repaired have often been stripped or rusted out beyond repair. Some leaky fixtures may even progressively wear down the valve stems that they’re attached to. Once this occurs, these fixtures can no longer be tightened. In these instances, the only choice is to replace them. 5. Your Plumbing Fixtures Have a Dingy, Rusty Look It’s definitely time to have your fixtures upgraded if they have a dingy, rusty look despite your best efforts to clean them. Not only will your home look better after this upgrade, but you’ll also find it much easier to clean. You won’t have to experiment with new cleaning or polishing solutions, and you can enjoy a living environment that always looks fresh and inviting. Brand-new fixtures are incredibly easy to take care of. Moreover, given that newly installed fixtures are less likely to have leaks or pooling water at their bases, they’re also less likely to develop problems with mold, mildew, bacteria, and other common pathogens. 6. Your Water Quality Has Gone Down Leaky fixtures create the perfect environment for mold and bacteria to thrive. Changing them out at the end of their lifespan can actually improve your water quality. Most plumbing fixtures are designed to last 15 to 20 years. However, the expected lifespans of plumbing fixtures is often calculated with optimal conditions in mind. For instance, plumbing fixtures are more likely to last for two full decades in homes that don’t have excessively hard water, when fixtures aren’t being overused, and when problems with leaks and rusting don’t exist. In the typical home, residents regularly contend with leaky faucets, mishandling, excessive use, and gradual corrosion. Waiting two decades before changing your plumbing fixtures out can have a marked impact on your home’s water quality. Depending upon where your outdated fixtures are located, this can mean having an unacceptably low quality of water for: Drinking Cooking Bathing and showering Washing your personal items If you’ve got rusty, cloudy, or all-around murky water coming out of your taps, old fixtures are a likely culprit. 7. You’ve Got Mold or Pest Problems That Won’t Go Away If you’ve got persistent mold problems in your home, the best way to deal with them is by identifying and eliminating their source. In many instances, the source of indoor mold is a slow or inconspicuous leak. Unfortunately, many of these leaks exist at faucets. A leaky faucet doesn’t have to make a lot of noise or keep you up at night to cause serious problems. Faucet leaks add moisture to the indoor environment. Depending upon where they’re located and how fast-moving they are, they can also saturate building materials and create standing bodies of water. Changing leaky faucets out will leave you with dryer cabinets and sink areas, less indoor moisture,

8 Solid Reasons to Have a Plumbing Maintenance Plan

Many homeowners in San Antonio don’t spend a lot of time thinking about their plumbing systems until something goes awry. Burst pipes, clogged drains, and whole-house backups are urgent and unfortunate reminders that preventative maintenance is always worthwhile. Purchasing a plumbing maintenance plan is a great way to sidestep costly issues that are largely the result of negligence. The money that you spend on a plumbing maintenance plan is guaranteed to pay for itself over the years. These plans can help preserve the value and integrity of your home, keep building residents safe, and ensure that you remain compliant with the terms of your home insurance policy and home warranty. The following are eight solid reasons to invest in a plumbing maintenance plan today. 1. Stop Dealing With the Consequences of Costly Oversights Plumbing maintenance plans take the stress and hassle out of plumbing maintenance. When you sign up for a maintenance program, the scheduling of essential preventative services will be done for you. You’ll get helpful reminders when it’s time for a whole-house plumbing inspection, and you’ll get regular services that include: Leak detection Water pressure checks Faucet and hose bib inspections Toilet inspections Water heater maintenance and inspections These services allow plumbers to identify minor issues before they’ve had the chance to spiral out of control. As such, your repair costs will be lower, and you’ll be far less likely to have major flooding or backup events that cause water damage to your property. 2. Get Priority Scheduling Signing up for a preventative maintenance plan is a great way to forge a solid relationship with a trusted plumbing company. Homeowners who have maintenance plans in place are often viewed as V.I.P. customers. This makes it easier for these consumers to get timely service during busy seasons and at all other times when their providers are inundated with repair requests. Maintenance plan memberships can also provide access to special discounts and other loyalty benefits. 3. Protect and Improve Resident Health Routine plumbing maintenance is the best form of prevention for whole-house backups, burst pipes, and failed water heaters. Many of these events can flood your home with water that’s rife with chemical and biological contaminants and set the stage for serious mold issues. If you have someone living in your home who suffers from asthma, allergies, or any other chronic respiratory health issue, you probably go out of your way to keep your HVAC system in top condition. Surprisingly, taking good care of your plumbing can be just as important to this end. When plumbing systems are working as they should, the risk of being exposed to harmful airborne contaminants is greatly minimized. Taking measures to prevent major flood events also protects pets and small children from having direct contact with gray water, black water, or the harmful pathogens they often contain. 4. Replace Worn Components Before the End of Their Lifespans Most major plumbing repairs and plumbing-related floods are the result of letting fixtures, appliances, and other key plumbing components reach the ends of their lifespans before replacing them. Annual plumbing inspections are opportunities for plumbing professionals to swap out worn parts before they’ve failed entirely. When homeowners stay on top of general maintenance, they’re often able to avoid even the most minor plumbing repairs entirely. Building a long-term relationship with reputable plumbers and purchasing a preventative maintenance plan streamlines all plumbing elements for lifelong efficiency. With the right plumbing company and the right plan, you can rest assured that: The right fixtures and appliances are correctly installed You’ve been properly instructed about how to use and care for all aspects of your plumbing system Wear-related issues are resolved before problems actually arise Your plumbing fixtures and appliances will work more efficiently too. This means less water waste, lower water bills, and fewer earlier-than-anticipated replacements. 5. Plan in Advance for Major Plumbing Overhauls and Replacements Failing to pay attention to your plumbing doesn’t just allow minor problems to spiral. It can also leave you sidelined by the sudden need for major appliance or fixture replacements. When you have licensed plumbers performing whole-house inspections, you can get early warnings about aging water heaters, toilets, pipes, faucets, bathtubs, shower pans, and more. These warnings give homeowners ample opportunity to plan and budget for essential plumbing improvements. 6. Enjoy Higher Water Quality Water quality testing is an important part of routine plumbing maintenance. This isn’t something that you’re likely to think about if you’re only scheduling plumbing service when your showers won’t drain, your toilets are clogged, or water is backing up into your home. Water quality assessments will let you know whether you’ve got hard water, high levels of waterborne contaminants, or other problems that are affecting the taste, purity, and all-around potability of your tap water. Following these inspections, plumbers can help homeowners learn about the benefits and best applications for water purifiers and water softening equipment. If you have need of either of these plumbing additions, making these improvements now could result in softer skin and hair, better hydration, improved health, and better-tasting water for everyone. 7. Limit Water Pressure and Lower Your Water Bills Another common oversight among Texas homeowners who don’t invest adequate effort into plumbing maintenance is excessively high water pressure. Having a forceful spray at your shower heads might feel good in the morning, but high water pressure can wind up costing you a veritable fortune over time. When water pressure is too high, a lot of water that flows out of the tap winds up going down the drains unused. Moreover, excessive pressure expedites normal wear. In turn, appliances like dishwashers and washing machines don’t last as long as they were meant to. Given that plumbing maintenance plans include water pressure testing, you can have the necessary adjustments made before excess pressure causes your appliances and other plumbing features to break down. 8. Keep Your Home Insurance or Home Warranty Intact Home warranties and home insurance plans keep homeowners protected from the

Pet Safety in San Antonio, TX

9 Ways to Keep Your Plumbing and Your Pet Safe

Most homeowners who own pets understand that sometimes their furry friends and plumbing don’t mix. Keeping your home’s plumbing system and pets in check can be challenging, particularly if you don’t know how your four-legged friends can negatively affect your plumbing. Pet-related plumbing issues are increasingly common for almost one-third of all San Antonio homes. At [company_name], we understand that you love your pets, so we’ve prepared this guide to help you pet-proof your plumbing system to avoid serious and costly issues. 1. Use a Drain Strainer to Prevent Clogs It’s crucial to give your furry friend a warm and nice bath to keep him clean. But if you bathe your pet in the bathtub or shower, you could have a massive clog in your drain. Even if your cat or dog doesn’t seem to be shedding at the time, or even at all, the fact is that all animals release some fur. When washing your pet, ensure a drain stopper or strainer is in place. This will prevent animal fur from going down the drain, thereby preventing clogs. 2. Cover Exposed Pipes If you have exposed pipes and drains in your home, ensure you cover or wrap them to prevent pets from getting to them. When developing teeth, kittens and puppies can use your pipes as their plaything and chew on them. If your pet chews down on your pipe, you may have to spend a lot of money on costly plumbing repairs. Furthermore, your pet could get hurt if they get a paw caught in the pipe or drain. You’ll be adding a vet bill to your expenses. To avoid potential issues, cover any exposed pipes and ensure your pets have enough toys to chew on or keep them occupied. 3. Flush With Caution Flushing kitty litter down the toilet seems like a simple and convenient way to clean up after your cat, but it’s never a good idea. Although cat litter is flushable, the chances of getting it clogged in your sewer lines are high, mainly if you use a septic tank. Cat litter absorbs moisture and increases to 10+ times its original volume. Thus, when you flush it down your toilet, it can expand and cause a massive obstruction in your plumbing. In addition, waste contained in the litter can have contaminants, such as Toxoplasma Gondii, which municipal water treatment systems cannot remove. Therefore, it’s best to throw the waste in a trash can and remember to take the trash out often to protect your family and your pet’s health. 4. Install Pressure-Balancing Valves If somebody flushes the toilet while you’re showering, you or your pet could get scalded suddenly. If this is occurring in your home, it’s probably because your plumbing system doesn’t have pressure regulating valves. Without these valves, hot water could suddenly jet out of your faucets and showerheads, scalding anyone who could be using the water. In addition, constant water flow at high pressure can dramatically erode your pipes, faucets, dishwasher, washing machine, and other plumbing fixtures, reducing their lifespan and causing costly structural damage. Thankfully, you can avoid these plumbing problems and keep your pets safe by installing pressure-balancing valves. 5. Wash Dirty Pets Outside If you have a cat or dog who loves playing in the mud, you’ll have a lot of dirt to clean up. If you wash your furry friend in the bathtub or shower, all that dirt and shedding fur will come off and get into your drains. This debris can cause a severe obstruction that can damage your plumbing. Rather than having to spend a lot of money on plumbing repairs every time you wash your pet, always rinse them off outside when the weather allows. 6. Ensure Your Pets Have Enough Water When your furry friend gets thirsty and has run out of water, rest assured they will go to a great extent to find some. Some animals are clever enough to have known how to turn on the faucets. This could be potentially dangerous, especially if you are away from home. If there’s something covering the drain and your furry friend turns on the faucet, this could cause flooding or, at the very least, increase your water bill. The simplest and safest thing to do is leave a lot of fresh water out for your furry friend so that he doesn’t need to look for it elsewhere. For increased safety, leave bathroom doors closed whenever you aren’t home. Also, ensure you keep your pet’s water bowl clean for their own health and clean it at least once every day for sanitary conditions. 7. Cover Toilets Animals don’t know what water is fit for consumption. Whenever they see any open water, they get inclined to drink it. And if you leave your toilet uncovered, the toilet bowl will be the first place they’ll go. Toilet water is unsanitary and harmful to your pet’s health due to an array of cleaners and chemicals used to clean the toilet. Make it a family policy to keep your toilet seat always covered. Your pet drinking water from the toilet bowl may not damage your plumbing, but it’s not suitable for your furry friend. 8. Store Plumbing Chemicals Responsibly Although it’s not advisable to use harsh chemicals in your plumbing system because these store-bought cleaners can cause damage to your pipes, you might have them in your home. Exposure to these chemicals can present serious health risks. Always keep drain cleaners and other plumbing chemicals in sealed containers and place them out of your pet’s reach, just as you’d for your children. 9. Keep an Eye on Pets Who Like Digging If your pet spends a lot of time digging holes in your backyard, you must ensure they don’t dig too deep. Your sewer lines are buried far enough beneath the surface to protect them from environmental factors but also close enough for quick access by technicians. If your dog digs enough to access those lines, you could

Drain cleaning in San Antonio, TX

The Truth About Chemical Drain Cleaners

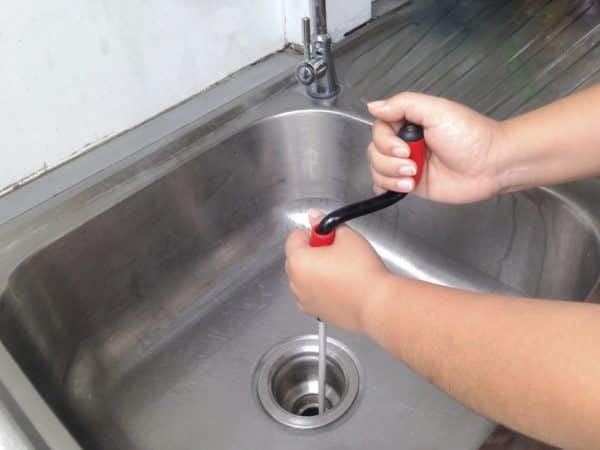
Chemical drain cleaners have been around since the mid-twentieth century, and they are a common option for people who experience clogged drains. However, that doesn’t mean they have no negative effects on your pipes, even though they are useful in the short term. The chemical drain cleaners that are on the market for residential use have drawbacks in addition to their benefits, and it’s important to know about alternatives for unclogging drains. How Chemical Drain Cleaners Work Drano and Liquid Plumbr are two popular brands of chemical drain cleaners. They come in liquid, gel, or powder form. Let’s look at what the main ingredients are for chemical drain cleaners and how they work. Caustic chemical drain cleaners are basic or alkaline substances such as lye and caustic potash. They give off electrons and with their sodium hydroxide ions create a reaction that releases heat and turns thick grease into a more soap-like substance that’s more easily dissolved. They are heavier than water and so can reach a clog even through standing water. Oxidizing chemical drain cleaners, like caustic ones, are also heavier than water and can also reach clogs through standing water. Household bleach, peroxides and nitrates release gas and heat by causing the clog to become oxidized, breaking down the organic material and clearing the clog. This type of chemical drain cleaner is effective for removing food and hair-based clogs. Acid chemical drain cleaners are what plumbers use and not available for residential use. Muriatic acid, also known as hydrochloric acid, is one type. It is one of the components found in stomach acid, but the version for plumbers is concentrated and only plumbers with a license can purchase it. Another option plumbers use is sulfuric acid, which is also alkaline and releases hydronium ions. Both attract electrons from the clogging substance and the chemical reaction from either releases heat, which melts congealed grease and softens the clogging substance, enabling it to move down the pipes. Pros and Cons of Chemical Drain Cleaners There are many benefits and drawbacks to using chemical drain cleaners. Consider the following when deciding whether to use one. Pros of chemical cleaners include convenience, affordability, and versatility. They’re easy and fast-acting as well as effective. They work on various clogs caused by food, soap scum buildup, grease, and hair. They’re affordable and widely available, with prices ranging from $2 to $15. They work on many types of clogs, with food and hair buildup being the most common causes. The cons include potential damage to pipes, potential damage to sinks, and the fact that they aren’t eco-friendly. While most are effective, there is no guarantee behind them and they may mask an underlying issue. If used incorrectly or you don’t know the cause of the clog, liquid chemical drain cleaners can cause significant damage to your pipes. They also shouldn’t be used on garbage disposals for the same reason. Even Drano, which contains an agent in some products to prevent pipe damage, will not keep your pipes in optimal condition. Furthermore, not all liquid chemical drain cleaners are suitable for sinks, either. For example, porcelain and enamel may be vulnerable to damage from the ingredients. Another con is that chemical drain cleaners kill the beneficial flora in the septic tank, which leads to waste buildup. Chemical drain cleaners can also be harmful when touched or inhaled, deeming them not safe for the environment. As previously stated, while most cleaners can tackle small clogs, they’re not guaranteed to work in every situation. For example, they will not clear toy blocks or other solid objects. Homeowners should keep an eye on the results because when a chemical drain cleaner works temporarily but the clog reappears, it’s a sign of a more serious underlying issue, such as broken pipes or a malfunctioning sewer line. Alternatives to Chemical Drain Cleaners Using a plunger is far more cost-effective and sustainable than using chemical drain cleaners. It works on clogs that are minor or on slow drains, and it doesn’t use any chemicals. Sometimes, there are problems with clogs that are farther down in the pipes. For this, a pipe snake or drain snake is effective. It can reach down to bring up, dislodge, or break down the cause of the clog. This alternative also doesn’t use any chemicals. There are also more environmentally friendly liquid cleaners available as well. Enzymatic biological drain cleaners use a natural mixture of enzymes and bacteria to help remove clogs. Some people use a homemade drain cleaner made of lemon juice or a combination of white vinegar, baking soda, and hot water. Usually, the recipe calls for pouring boiling hot water down the drain, then following it with distilled white vinegar or lemon juice and baking soda, or vice-versa. The proportions call for three cups of boiling water, one cup of baking soda, and one cup of distilled white vinegar or lemon juice. You can simply pour it as a mixed solution. Give the clog time to clear and then test it. You can also pour a half-cup of baking soda and a half-cup of distilled white vinegar into the drain. Follow that with a small pot of boiling water, and give it an hour to work before checking if the clog has cleared. Professional Drain Clearing Methods Paying for a professional to clear a drain could potentially be equal to the cost of several attempts using a chemical drain cleaner. However, a plumber will be able to evaluate your drain for the safest, most effective way to dislodge the clog. They are especially valuable if you’re unable to figure out what is causing the clog, or if there are more serious underlying issues beyond the immediate clog. Drain snaking or cabling uses a long, narrow tool known as a drain snake, plumber’s auger, or plumber’s cable to reach into your drain pipes. It is usually about 50 feet long with an auger at the end. It spirals down the drain and comes into