Water Softener System Cost in 2025

Water Softener System Cost in 2025: Types, Installation & Maintenance

Water softener system costs in 2025 vary widely depending on system type, installation complexity, and ongoing maintenance needs. Whether you’re considering a salt-based softener for hard water or a low-maintenance salt-free model, understanding the full cost breakdown helps you make an informed decision.

This guide provides a complete overview of residential water softener pricing in 2025, including system comparisons, installation fees, maintenance costs, and how local conditions like San Antonio’s hard water levels impact your total investment.

What is a water softener system and how does it work?

A water softener system is a household appliance designed to remove hardness minerals such as calcium and magnesium from water. Hard water can damage pipes, reduce appliance efficiency, and leave residue on surfaces.

A standard water softener includes three main components:

  • Resin tank – where ion exchange occurs
  • Brine tank – holds the salt solution used for regeneration
  • Control valve – regulates the water flow and regeneration cycle

The most common method used is ion exchange. In this process, hard water flows through resin beads charged with sodium or potassium ions. These beads capture calcium and magnesium ions and release sodium in return.

A salt-based water softener removes calcium and magnesium using sodium ions.

Salt-free water softeners use template-assisted crystallization (TAC). These systems transform hardness minerals into crystals that do not adhere to surfaces. Unlike ion exchange, they do not reduce the hardness level, but they prevent scale buildup.

How much does a water softener system cost in 2025?

Most water softeners cost between $800 and $3,000 in 2025, depending on system type, features, and installation method.

The price of a water softener system is primarily determined by the technology used, system capacity, and whether it’s professionally installed or DIY-installed. A basic salt-free softener may cost as little as $500, while advanced dual-tank systems can exceed $4,000, including professional installation and optional accessories.

Average Cost Ranges by System Type:

  • Salt-based systems: $600–$2,500
  • Salt-free systems: $500–$2,000
  • Dual-tank systems: $1,200–$4,000
  • Reverse osmosis systems: $1,000–$3,000

Horizontal bar chart comparing water heater installation costs by type

Salt-based systems are the most common and effective for treating high levels of hardness, especially above 15 GPG (grains per gallon). Salt-free systems are preferred in areas where salt discharge is restricted or low maintenance is desired. Dual-tank softeners offer uninterrupted service and higher grain capacity, which makes them suitable for large households. Reverse osmosis systems soften water and filter out additional contaminants but typically serve a single faucet or appliance.

What factors affect the price of water softener systems?

Icon grid showing 6 water softener installation cost factors

Water softener system prices vary due to grain capacity, brand, certifications, and local water quality. Systems with higher capacity, advanced technology, and reputable brand warranties typically cost more.

Key Attributes Affecting Cost:

  • Grain Capacity: Systems are rated by grain capacity, which measures how much hardness they can remove before regeneration.

    A 32,000-grain unit may cost around $700, while a 64,000-grain model could reach $1,500 due to its larger resin volume and longer service life.
  • Brand: Popular brands like Culligan, Whirlpool, and AO Smith charge premium rates due to higher build quality, customer support, and extended warranties.
  • Efficiency Ratings: Certified models that meet NSF 44 or WQA Gold Seal standards ensure tested softening performance and salt efficiency. These models may add $100–$300 to system costs but reduce operating expenses over time.
  • Water Hardness Levels: Hardness above 15 GPG often requires a higher-capacity system or more frequent regeneration, increasing both upfront and long-term costs.

    Homes in hard water zones like San Antonio, TX commonly require 48,000–64,000 grain systems.

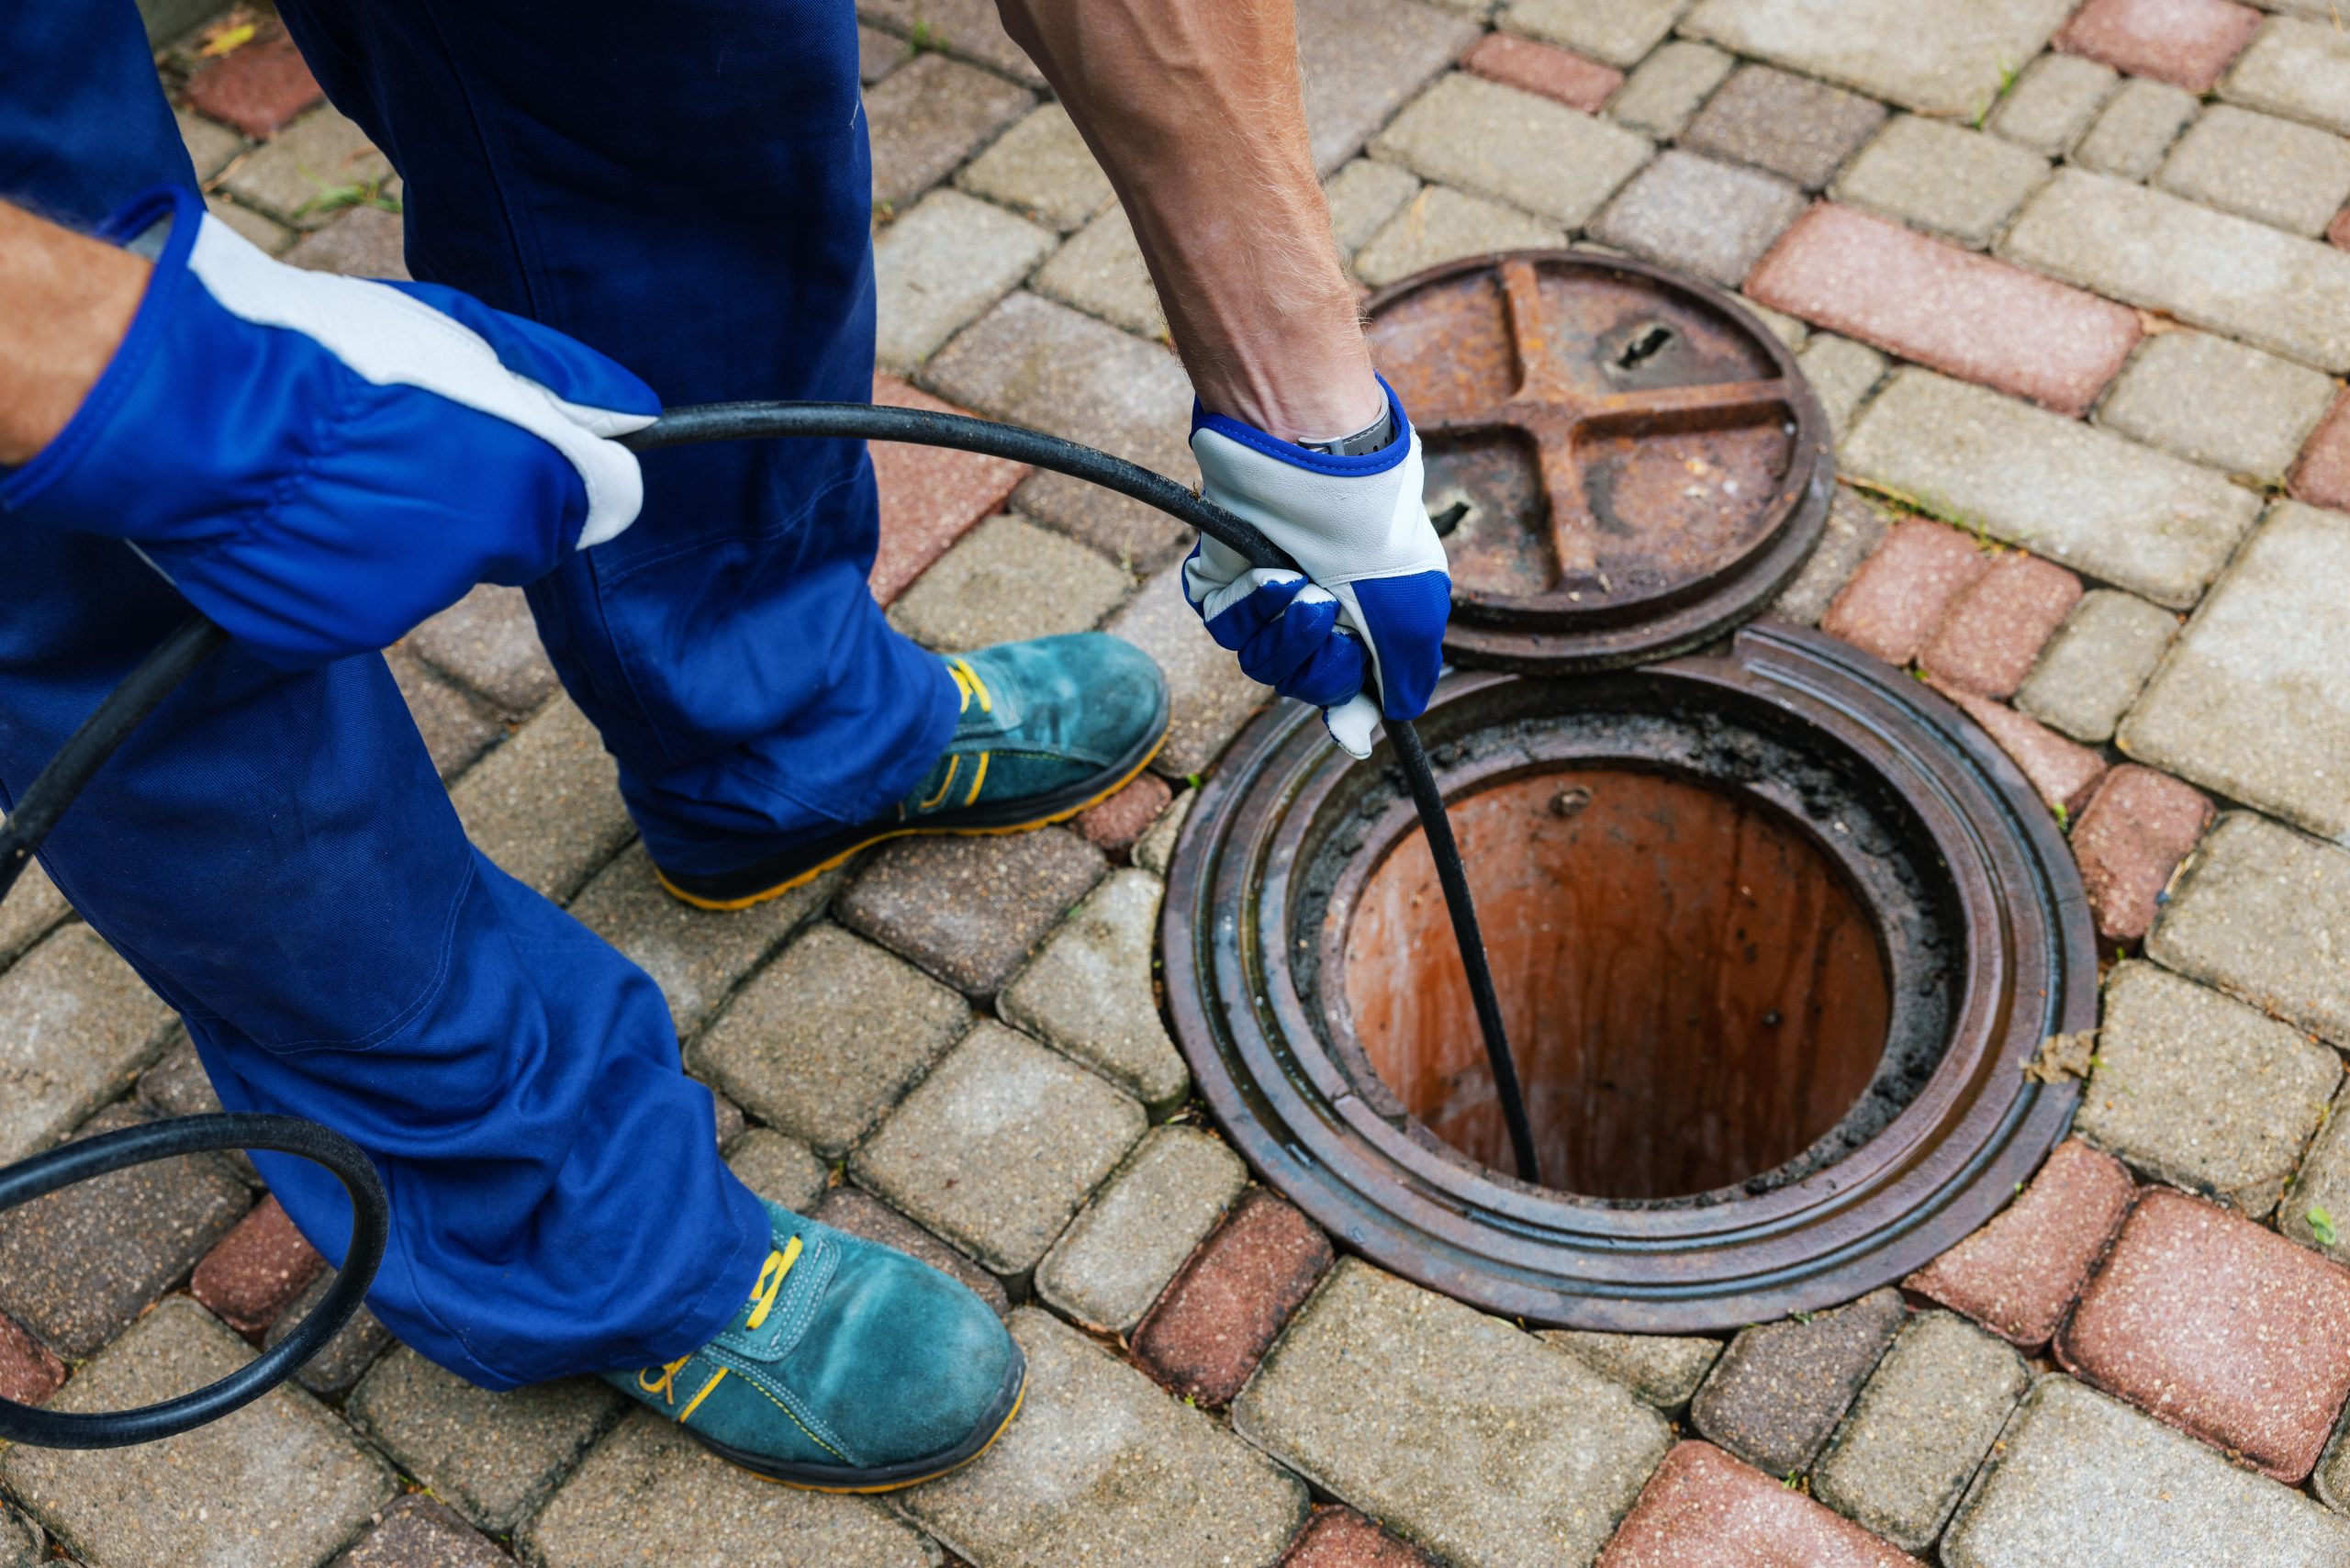
Is installation included in water softener system cost?

Installation is often a separate expense, typically ranging from $300 to $1,000 depending on system complexity and local plumbing requirements.

Most manufacturers sell water softener units without bundled installation. Homeowners may hire a licensed plumber for professional water softener installation or attempt DIY installation, especially with simpler systems. However, DIY setups may lack compliance with plumbing codes or warranty conditions.

Installation Methods:

  • Professional Installation: Involves licensed labor, proper drainage setup, backflow preventers, and inspection approval. Labor cost ranges from $300 to $1,000 depending on the home’s layout and water line access.

    In cities like San Antonio, licensed plumbing installation is required if connecting to municipal water supplies.
  • DIY Installation: Some compact or pre-assembled softeners support homeowner installation. Although it reduces labor costs, it can lead to code violations, especially without knowledge of PEX piping, drainage connections, or electrical grounding.

Other Cost Factors:

  • Permit Fees:  Many municipalities, including San Antonio, require a plumbing permit for water softener installation. Permit fees typically range from $50 to $150.
  • Backflow Prevention:  State plumbing codes often mandate backflow devices, which add $100–$300 to total setup costs.

What is the cost difference between salt-based and salt-free systems?

Visual comparison between salt-based and salt-free water softeners

Salt-based water softeners cost more to maintain but provide higher performance for very hard water. Salt-free systems are lower in maintenance but less effective for extreme hardness.

Water Softener System Comparison:

System Type System Cost Installation Cost Maintenance/Year Lifespan
Salt-based $600–$2,500 $300–$1,000 $100–$300 10–15 years
Salt-free $500–$2,000 $300–$800 $50–$150 10–20 years

Salt-based systems remove calcium and magnesium ions through ion exchange, making them ideal for homes with hardness levels above 15 grains per gallon (GPG). These systems require regular salt refills and occasional resin replacement, increasing lifetime costs.

Salt-free systems, often using template-assisted crystallization (TAC), don’t actually remove minerals but prevent them from forming scale. They’re preferred in eco-sensitive areas and require less frequent maintenance.

Advantages:

  • Salt-based systems: Best for hard water, higher upfront and maintenance cost, uses sodium or potassium.
  • Salt-free systems: Low-maintenance, more sustainable, but less effective above 15 GPG.

For homes in hard water regions like San Antonio, salt-based systems are generally more effective despite the higher cost.

Are there hidden costs in owning a water softener?

Yes, owning a water softener includes hidden costs such as salt, electricity, and occasional part replacements that can add up over time.

While the system and installation represent the main upfront costs, long-term ownership involves several ongoing but essential expenses. Understanding these costs ensures accurate budgeting.

Recurring Hidden Costs:

  • Annual Salt Cost: Salt-based systems require regular salt refills. Most households spend $40 to $120 per year on softening salt, depending on water usage and regeneration frequency.
  • Resin Replacement: Resin beads lose exchange capacity over time. Most systems require resin replacement every 7 to 10 years, costing between $100 and $300.
  • Electricity Usage: Water softeners use electricity during regeneration cycles. The energy cost is minimal, usually between $10 and $20 per year.
  • Filter Replacements:  If the system includes pre-filters or sediment filters, replacements are needed every 6 to 12 months, costing $20 to $100 annually.

These maintenance costs may vary based on water hardness, system efficiency, and household size.

How do local factors impact pricing?

In San Antonio, water softener costs are influenced by high water hardness, permit fees, installer demand, and available rebates.

Local Pricing Influencers:

  • Water Hardness in San Antonio: The average hardness in San Antonio ranges from 15 to 20 grains per gallon (GPG). Homes in this range typically require high-capacity salt-based softeners (48,000–64,000 grain), which cost more than smaller systems.
  • Installer Competition: The cost of professional installation varies depending on plumber availability. In high-demand seasons, prices increase due to limited licensed contractors.
  • Permit and Inspection Requirements: San Antonio requires a plumbing permit and backflow prevention device for systems connected to the municipal supply.

    Permit fees add $50–$150. Backflow devices may cost an additional $100–$300, depending on model and installation complexity.

  • Rebates and Credits: Occasionally, the city or utility companies offer rebates for water-efficient systems. These incentives reduce the overall system cost by $100 to $300, depending on local programs.

In San Antonio, installation cost ranges from $350 to $950 due to labor, plumbing modifications, and code compliance.

Frequently Asked Questions

Is a water softener worth the cost?

Yes, it extends plumbing lifespan and reduces soap and detergent usage, saving $200 to $500 annually in utility and maintenance costs.

Water softeners prevent scale buildup in pipes and appliances, which lowers the risk of water heater failure, clogged plumbing, and increased energy use. These long-term savings offset the initial investment, especially in areas with hard water.

Can I install a water softener myself?

No, unless you have plumbing experience and understand building codes. Otherwise, hire a licensed installer. DIY installation can void warranties, lead to cross-contamination, or violate local plumbing regulations. Professional installation ensures proper drainage, electrical connection, and compliance with municipal codes, especially in cities like San Antonio.

How often should I service my system?

Schedule annual service for salt-based systems, including filter inspection and brine level checks. Resin replacement is needed every 7 to 10 years. Regular maintenance ensures consistent performance and prevents efficiency loss. For salt-based systems, monitor the brine tank monthly and check for salt bridging. Filter cartridges in pre-filtered systems may need semi-annual replacement.

Do I need a plumber to install a water softener?

Yes, in most cases. A licensed plumber is required when connecting to municipal water lines or installing backflow prevention devices. Some municipalities legally require a permit and inspection. Professional installers ensure correct piping, drainage slopes, bypass valve installation, and grounding, reducing risk of leaks or code violations.

Final Thoughts

In 2025, water softener system pricing depends on system type, installation complexity, and local water conditions. Homeowners can expect to pay between $800 and $4,000 in total for a system, including setup and 10-year maintenance.

Salt-based systems offer more effective performance in high-hardness areas but come with higher long-term costs. Salt-free systems are budget-friendly and low-maintenance, ideal for mild to moderately hard water.

For expert installation in San Antonio, Anchor Plumbing Services offers reliable water softener setup with code-compliant workmanship and transparent pricing. Our licensed plumbers ensure efficient, long-lasting performance tailored to your home’s water conditions.

Hydro-Jetting in Helotes, TX

Slab Leak Guide: Causes, Signs, Detection, Repair & Cost

If your water bill has suddenly increased without any change in usage, you may have a slab leak. Slab leaks are one of the most serious hidden plumbing issues in homes with concrete foundations. They often go undetected until they cause major damage to your flooring, foundation, or indoor air quality.

This guide explains what a slab leak is, what causes it, how to spot early warning signs, how professionals detect it, and which repair methods are best. You’ll also learn how to prevent future slab leaks, and understand the cost factors.

What is a Slab Leak?

A slab leak is a water leak that develops beneath the concrete foundation of a home due to damaged or broken water pipes. These leaks are often caused by corrosion, shifting soil, or high water pressure, and can go undetected for long periods.

Leaks may occur in both hot and cold water lines. Even a small pinhole leak can release gallons of water per day. Over time, this can weaken the foundation, increase moisture levels, and create structural instability.

Most slab leaks are hidden and silent. Some happen slowly, while others burst and cause immediate flooding. Early detection is critical to reduce damage and avoid costly repairs.

What Causes Slab Leaks?

Slab leaks often start when aging pipes lose integrity. Old copper or PVC lines become brittle over time. Soil with high acidity or alkalinity attacks pipe walls. Rapid corrosion rates can eat through metal in months. Together, pipe material and age, soil composition and pH, and corrosion rate set the stage for hidden leaks.

How Does Pipe Corrosion Cause Slab Leaks?

Corrosion occurs when soil chemistry attacks metal pipe walls. A high corrosion rate in acidic or alkaline soils thins the metal until it fails. Pipe material integrity suffers as metal thickness loss accelerates. Older copper lines without corrosion resistance coatings are most at risk.

How Can Abrasion Wear Through Slab Pipes?

Abrasion happens when soil particles grind against the pipe surface. Coarse sand and gravel increase surface wear. Flow turbulence inside the pipe raises exposure duration of abrasive particles. Over time the pipe surface hardness erodes and a leak develops.

How Does Poor Installation Lead to Slab Leaks?

Installation quality affects long-term pipe performance. Loose joint seals or improper joint type allow water to seep at connection points. Incorrect pipe slope causes water to pool and stress pipe walls. Inadequate support spacing and loose backfill compaction leave pipes vulnerable to shifting loads.

How Do Soil Shifts Contribute to Slab Leaks?

Soil movement bends or stretches pipes until they crack. Clay soils expand with moisture and shrink when dry, causing seasonal soil shifts. Ground settlement rate in sandy soils can pull pipes apart at joints. Frost heave potential creates upward pressure that fractures buried lines.

Can High Water Pressure Cause Slab Leaks?

Excessive water pressure stresses pipe walls beyond their design limits. Static PSI above safe thresholds causes small cracks to grow. Frequent pressure spike without a pressure regulator worsens stress. Over time pipe wall stress tolerance is exceeded and a rupture occurs.

What Are the Signs of a Slab Leak?

Signs of a slab leak include a sudden spike in your water bill, warm or wet spots on the floor, a persistent musty odor, visible mold or mildew on walls, foundation cracks, low water pressure, and the sound of running water when no taps are on. Early detection of these symptoms helps you act quickly to limit damage.

  • Unexpected High Water Bills: Even a slow leak beneath your concrete foundation can release dozens of gallons each day, driving your bill up without any change in water use.
  • Unexplained Water Meter Movement: If your meter dial spins while all taps and appliances are off, it often points to a hidden leak under the slab.
  • Low Water Pressure: Pressurized water escaping under the slab reduces flow at faucets and showers, causing a steady drop in water pressure.
  • Sound of Running Water: You may hear faint water flow or dripping noises in the floor when no fixtures are open, indicating a pressurized line breach.
  • Warm Spots on the Floor: Leaks in hot water pipes create localized warmth in flooring materials and raise slab temperature above room ambient.
  • Damp or Wet Flooring: Moisture seeps upward from the slab, leaving tile grout soft or hardwood planks damp around the leak area.
  • Musty or Moldy Odors Near Slab Areas: Constant moisture under the slab nurtures mold growth that emits a persistent musty smell inside your home.
  • Visible Mold or Mildew on Walls: Rising humidity and wet framing near slab leaks often produce mold patches on lower walls and baseboards.
  • Foundation Cracks: Water pressure beneath the slab can force cracks to open in your foundation, ranging from hairline splits to wider fractures.
  • Pools of Water Along Your Home’s Edge: Leaking water often follows the slab perimeter and collects as shallow pools around your foundation.
  • Patchy, Lush Lawn Growth Over the Slab: Extra moisture under the slab feeds grass roots above, creating uneven green patches in your lawn.
  • Sinking or Shifting Soil Near the Foundation: Continuous leaks wash away soil support, causing depressions or soil movement at the foundation edge.
  • Unexplained Indoor Humidity: Hidden slab leaks elevate indoor moisture levels, leading to condensation on windows, walls, and AC vents.

How Do Plumbers Detect Slab Leaks?

Plumbers detect slab leaks using a mix of specialized methods and equipment. Acoustic listening devices pinpoint leak location with high accuracy by translating sound frequency into visual data. Infrared thermography reveals temperature differences on the slab surface, with sensitivity down to fractions of a degree. Most setups take under an hour to install and require only basic calibration. Technicians need formal training in equipment operation and data interpretation to ensure reliable results.

When Is Video Pipe Inspection Preferred?

Video pipe inspection uses a camera mounted on a flexible cable to inspect pipe interiors. Its high accuracy lets plumbers see cracks, corrosion, and joint failures directly. Although costlier than acoustic or thermal methods, it is accessible for most residential jobs. This method excels when other detection tools flag a general area but cannot confirm the exact breach point.

How Much Does Slab Leak Repair Cost?

Slab leak repair costs typically range from $800 to $3,500. Labor makes up 50–60% of the cost, while materials cover the rest. Emergency repairs add 20–30% to the total. Urban areas are usually 10–15% more expensive than rural regions due to higher service rates.

What Repair Methods Are Available for Slab Leaks?

Available repair options include epoxy injection, spot repair clamps, whole repipe, and pipe rerouting. Epoxy injection cures in as little as 24 hours and seals small cracks with minimal slab disturbance. Spot repair clamps cause low disruption and suit a single leak location. Full repipe duration can span several days but replaces all aging lines for lasting performance. Rerouting is labor-intensive, as new lines must be laid around the existing slab footprint.

When Should You Choose a Full Repipe?

Full repipe is ideal when corrosion or material failure is widespread. It offers long term durability that patch repairs cannot match. Although the upfront cost is higher than patch repairs, a full repipe often includes a multi-year warranty status that protects against future leaks.

Can Slab Leaks Damage My Foundation?

Slab leaks can widen foundation cracks beyond mere hairline splits. The settlement amount under the slab can reach half an inch or more as soil support erodes. A high structural risk level emerges when crack width exceeds safety thresholds. Repair urgency becomes critical when visible damage indicates active soil wash-out.

How Can I Prevent Future Slab Leaks?

You can prevent slab leaks by pressure regulator installation to keep static PSI within safe limits. Perform routine pressure checks to catch spikes before they stress pipes. Ensure proper soil grading away from your foundation to reduce moisture accumulation. Add protective pipe sleeves to shield buried lines from corrosive soil.

Frequently Asked Questions (FAQ)

How can I tell if I have a slab leak?
Look for a sudden spike in your water bill, warm or wet spots on floors, low water pressure, and the sound of running water when no taps are on.

What are the most common causes of slab leaks?
Slab leaks most often stem from pipe corrosion, abrasion from soil particles, poor installation practices, seasonal soil shifts, and sustained high water pressure.

Are slab leaks dangerous to my home’s structure?
Yes. Hidden moisture under the slab can weaken concrete, lead to foundation cracks, and cause settlement that compromises structural integrity.

What tools do plumbers use to locate slab leaks?
Technicians use acoustic listening devices for accuracy, infrared thermography for sensitivity, and video-pipe inspection when visual confirmation is needed.

How long does slab leak repair take?
Minor repairs like epoxy injection cure in about 24 hours, spot-repair clamps take a few hours, while full repipes or reroutes can span several days.

Will my homeowner’s insurance cover slab leak damage?
Coverage varies by policy. Most insurers cover sudden slab leaks but exclude damage from long-term neglect or lack of maintenance.

Conclusion

You now understand how precise leak detection, targeted repair methods, and proactive prevention work together to protect your foundation from hidden slab leaks. Acoustic listening and infrared thermography reveal leaks early. Epoxy injection, spot repairs, and full repipes restore pipe integrity. Installing pressure regulators and proper soil grading helps prevent future breaches.

Need immediate slab leak repair or expert advice? Anchor Plumbing Services offers 24/7 emergency slab leak repair with experienced, licensed plumbers who use advanced detection tools and proven repair techniques to safeguard your home.

Hydro-Jetting in Helotes, TX

Hydro Jetting Plumbing: What It Is, How It Works & When You Need It

If you’re dealing with stubborn clogs, slow drains, or repeat backups, basic tools like plungers or drain snakes often can’t deliver long-term solutions. Hydro jetting is a professional plumbing service that uses high-pressure water to clear blockages, remove buildup, and restore full pipe flow, without harsh chemicals or unnecessary damage.

This guide will cover:

  • What Is Hydro Jetting in Plumbing?
  • How Hydro Jetting Works (Step-by-Step)
  • What Can Hydro Jetting Remove?
  • Key Benefits of Hydro Jetting
  • Signs You May Need a Hydro Jetting Drain Cleaning
  • Is Hydro Jetting Safe for Your Plumbing System?
  • Hydro Jetting vs. Snaking vs. Chemical Drain Cleaning
  • How Often Should You Schedule a Hydro Jetting Drain Cleaning?

By the end, you’ll understand why this powerful, eco-friendly method is a smart investment for homes, businesses, and municipal systems alike.

What Is Hydro Jetting?

Cross-section of pipe being cleaned with hydro jetting water jets

Hydro jetting is a high pressure water cleaning plumbing method for clogged drains and sewer lines. It uses water at pressures 1500 to 4000 PSI and flow rates of 2 to 10 GPM through a specialized nozzle to remove grease, scale, roots, and sludge.

Unlike snaking (which pokes a hole through a clog), hydro jetting cleans the full diameter of the pipe, restoring optimal flow and preventing future blockages.

How Hydro Jetting Works (Step-by-Step Process)

Hydro jetting process infographic from inspection to cleaning

Hydro jetting begins with an inspection, followed by a series of calibrated water-jet passes that fracture and wash away debris, delivering a complete clean of your plumbing system. Here’s what typically happens during a service visit:

  1. Camera Inspection (Assess Blockage): A CCTV drain camera enters the line to locate and categorize obstruction by blockage severity and root density, ensuring the jetter targets only the affected area.
  2. Equipment: The core setup includes a jetting machine connected to hose reels, a control unit for adjusting flow, and pressure gauges that monitor real-time PSI.
  3. Accessing the Cleanout Port: Opening an existing cleanout on a drainpipe provides direct entry to the sewer or plumbing main, preventing damage to fixtures and landscaping.
  4. Nozzle Selection: Technicians choose between forward-jet nozzles (to fracture solid clogs) and rear-jet nozzles (to scrub walls), matching nozzle types to the debris composition.
  5. Water Pressure: Operators calibrate PSI and GPM based on pipe material and blockage type, using the control unit’s equipment calibration to protect vulnerable sections.
  6. Cleaning Process: High-pressure jets fracture and flush debris—grease buildup, mineral scale, and sludge—in a continuous 360° sweep, restoring the pipe’s full diameter.
  7. Complete Cleaning: A final camera inspection confirms all residue is gone, verifying emergency cleaning standards and ensuring long-term effectiveness.

What Can Hydro Jetting Remove?

Pipe clogs like roots and grease removed by hydro jetting

Hydro jetting removes grease, food, tree roots, mineral scale, rust buildup, soap scum, hair, paper products, wipes and sludge from plumbing and sewer lines. Here’s what this service can safely and effectively remove:

  • Grease, Fat & Food Particles: In both home kitchens and commercial restaurants, fats, oils, and grease (FOG) solidify along pipe walls, narrowing flow over time. Hydro jetting pulverizes these sticky deposits and flushes them safely downstream.
  • Tree Roots: Even tiny cracks in pipes can allow invasive roots to enter. Light root infiltrations (under 2 inches) can typically be sheared off using a root-cutting nozzle. More severe blockages may require combining hydro jetting with mechanical cutting tools.
  • Mineral Scale & Rust Buildup: In hard water regions, pipes often develop limescale and iron oxide deposits, especially in galvanized or cast-iron systems. Hydro jetting effectively breaks down and removes these mineral layers, restoring full pipe diameter and improving flow.
  • Soap Scum & Hair: Bathroom drains are prone to soap buildup and hair accumulation, which gradually form soft but stubborn clogs. Hydro jetting’s rear-facing jets flush these materials out without the need for harsh chemicals.
  • Paper Products, Wipes & Sludge: Even so-called “flushable” wipes and paper products can clog older sewer lines, especially when combined with sludge or grease. Hydro jetting’s forward and rear jets break up and remove these tough materials efficiently.

Key Benefits of Hydro Jetting

Benefits of hydro jetting include complete 360° pipe cleaning, chemical-free operation, prevents future clogs, clears blockages, and saves on long-term maintenance costs. By scouring every inch of the pipe wall, it removes grease, scale, rust, hair, roots and sludge before they harden, extending pipe lifespan. Its eco-friendly approach requires no toxic additives, and a single session can replace repeated snaking calls, making scheduled service more cost-efficient over time.

  1. 360° Pipe Cleaning: Unlike snaking, which only bores a narrow path through a blockage, hydro jetting scrubs the entire interior surface of your pipes, removing grease, sludge, mineral buildup, and small roots that lead to future clogs.
  2. Environmentally Safe: Hydro jetting uses only water—no harsh chemicals or caustic agents, making it a safe choice for families, pets, and septic systems. It’s an eco-friendly option that won’t harm your pipes or local waterways.
  3. Prevents Future Clogs & Extends Pipe Lifespan: By clearing out grease, scale, and debris before they harden into major blockages, hydro jetting reduces strain on your plumbing system. This proactive approach can add years of functional life to your pipes and reduce the need for major repairs.
  4. Faster & More Thorough Than Snaking: A typical residential hydro jetting service takes about 30–45 minutes, delivering a deep, comprehensive clean that snaking or chemical treatments can’t match.
  5. Cost-Effective in the Long Run: While the initial cost may be higher than a standard snaking service, hydro jetting offers excellent return on investment (ROI) by minimizing future service calls, preventing emergency excavations, and lowering lifetime maintenance expenses.

Pro Tip: Incorporate hydro jetting into your regular preventive maintenance plan, every 1–2 years for residential properties or quarterly for restaurants and food service businesses, to avoid disruptive and costly backups.

Signs You Need Hydro Jetting Drain Cleaning

Symptoms around a house showing need for hydro jetting

Signs you need hydro jetting include frequent backups, slow drainage, gurgling pipes, foul sewer odors or soft ground above lines, and older pipes with years of buildup. These symptoms indicate grease rings, mineral scale, hair mats or root intrusions are narrowing your drainpipes, and only a full 360° high-pressure water clean can restore proper flow and prevent further blockages.

Here are the detailed signs that hydro jetting is the right solution:

  • Frequent Clogs or Backups: If your kitchen sink, bathroom drains, or laundry lines clog repeatedly, even after professional snaking, it’s a sign of persistent buildup that basic tools can’t fully clear.
  • Slow Drainage Even After Snaking: If water still pools or drains sluggishly despite using an auger, it’s likely due to grease, sludge, or mineral scale coating the pipe walls. Hydro jetting scrubs these residues away, restoring proper flow.
  • Gurgling Sounds in Pipes: Strange gurgling or bubbling noises indicate trapped air pockets caused by partial blockages. High-pressure jetting flushes away both debris and trapped gases, quieting your system.
  • Sewer Odors or Soft Ground in the Yard: Foul smells near drains or unusually soft, soggy patches in your yard can signal sewer buildup or leaks beyond the immediate fixture. Hydro jetting the main sewer line helps eliminate odors and can prevent sinkholes or surface collapse.
  • Older Pipes with Years of Buildup: Homes built before the 1990s often use galvanized steel or cast-iron pipes, which are prone to rust, scale, and sediment buildup. Even if you haven’t had a full blockage yet, periodic hydro jetting can help prevent future failures and costly repairs.

If you’re noticing any of these symptoms at your home or business, don’t wait, contact our team today to schedule a professional camera inspection and find out if Trusted Hydro Jetting Service is the right solution for your system.

Is Hydro Jetting Safe for Pipes?

Pipe material safety chart for hydro jetting compatibility

Hydro jetting is safe for pipe materials like PVC, ABS, and copper when PSI and nozzle type are calibrated correctly. However, brittle clay, cast iron, and Orangeburg pipes risk joint cracks or wall fractures under high pressure. A pre-jetting CCTV inspection confirms pipe material and joint integrity, guiding the technician’s PSI control and nozzle selection to protect vulnerable sections. Here’s what you should know before scheduling service:

  • Safe for Modern Materials: PVC, ABS, and copper pipes are designed to handle water pressures up to 4,000 PSI. These materials often benefit from hydro jetting’s scouring action, which removes buildup and restores full pipe capacity without damage.
  • Risks for Older or Fragile Systems: Older materials, such as clay, cast iron, or Orangeburg pipes (common in homes built decades ago), can become brittle over time. Using excessive pressure or the wrong nozzle on these systems can crack joints or fracture pipe walls, which is why expertise matters.
  • Importance of Pre-Jetting Inspection: A video inspection (CCTV) confirms pipe material, locates weak spots, and reveals hidden cracks. Armed with this data, a technician selects appropriate PSI settings, nozzle types, and even bypasses compromised sections if needed.

Hydro Jetting vs. Snaking vs. Chemical Drain Cleaning

Choosing the right method starts with understanding each tool’s strengths and weaknesses:

Method Best For Pros Cons
Hydro Jetting
  • Stubborn, recurring clogs deep in the main or lateral lines
  • Preventive cleaning before root season or inspections
  • Removing grease rings in kitchen drains
  • 360° pipe cleaning: Removes all debris and residue, not just punching through clogs
  • Eco-friendly: Uses only water, no harsh chemicals; safe for septic systems and the environment
  • Extends pipe lifespan: Clears corrosive scale and buildup, helping prevent long-term pipe damage
  • Higher upfront cost compared to basic snaking or chemical treatments
  • Requires professional-grade equipment and a clear, clean-out access point
  • Needs a trained, licensed operator to set the correct pressures and avoid potential pipe damage
Snaking
  • Quick clearing of soft, localized clogs near fixture (hair, soap)
  • Emergency fixes when pros aren’t available immediately
  • Low-cost and readily available
  • Fast—often resolves minor blockages in one pass
  • No special setup or water usage
  • Leaves build up on pipe walls—clogs return faster
  • Can push debris further into the system if misused
  • No pipe wall cleaning, so minor obstructions remain
Chemical Clean
  • Small, recent grease or organic clogs in kitchen or bathroom drains
  • Homeowners seeking a quick DIY fix for light blockages
  • Easy DIY—available at stores, simple pouring
  • No special tools needed
  • Works overnight if soaking
  • Corrosive chemicals can weaken pipes and joints
  • Short-term solution—clogs often recur
  • Environmental hazard—chemicals can damage septic and local waterways

Comparison chart of hydro jetting vs snaking vs chemical cleaners

  • Hydro Jetting:  Uses high-pressure water jets to completely clear pipes, removing grease buildup, mineral scale, sludge, and even small root intrusions. It’s ideal for both emergency blockages and preventive maintenance because it cleans the entire pipe diameter, reducing the risk of repeat clogs.
  • Snaking: employs a flexible metal cable (auger) to mechanically punch through soft clogs like hair or soap buildup. It’s a quick and affordable solution for localized blockages, but it does not clean pipe walls, meaning leftover residue can cause future clogs.
  • Chemical Drain Cleaning: Uses caustic or enzymatic solutions to dissolve organic material (like grease or hair). While convenient for minor household clogs, these chemicals can weaken pipes over time and may damage septic systems or harm the environment if overused.

How Often Should You Schedule a Hydro Jetting Drain Cleaning?

Schedule hydro jetting based on property use typically every 1 to 2 years for homes, every 3 to 6 months for restaurants, and after major blockages or before trenchless repairs. Read the details below for your specific needs.

  • Residential Homes: For most households, schedule a full hydro jetting session every 1–2 years. Homes with multiple bathrooms, garbage disposals, or hard water conditions may benefit from annual service to prevent grease, mineral, and scale buildup.
  • Restaurants & Food Service: Food establishments experience rapid accumulation of fats, oils, and grease (FOG). To avoid costly downtime or health-code violations, schedule hydro jetting every 3–6 months as part of your preventive maintenance plan.
  • After a Major Clog Event: Following a severe blockage, deep-root intrusion, or mainline collapse, it’s smart to perform hydro jetting to remove any leftover debris, verify pipe integrity, and restore full flow
  • Prior to Trenchless Repairs or Pipe Relining: If you plan to install cured-in-place pipe (CIPP) lining or undertake trenchless repairs, hydro jetting before and after the process ensures the pipe walls are clean and smooth, essential for proper adhesion and long-lasting results.

Can hydro jetting damage pipes?

Hydro jetting only damages pipes when excessive PSI or improper nozzle selection is used on brittle materials. Modern PVC, ABS and copper handle up to 4,000 PSI safely, but clay, cast iron and Orangeburg pipes risk joint cracks or wall fractures without correct calibration. A pre-jet video inspection confirms pipe material and guides PSI control and nozzle choice to protect vulnerable sections.

Is hydro jetting safe for septic systems?

Hydro jetting is safe for septic systems because it uses only high-pressure water without chemicals. The cleanout port directs debris into the sewer or septic inlet, and water usage (20 to 40 gallons per session) falls within typical septic design. Professional operators ensure waste disposal complies with local regulations, preserving tank integrity and drain field function.

How Long Does Hydro Jetting Take?

A standard residential hydro jetting session takes 30 to 45 minutes, while commercial or root-heavy lines may require up to two hours. Duration depends on blockage severity, pipe length and diameter, and required passes to achieve a full 360° clean.

Can it remove tree roots completely?

Hydro jetting shears light to moderate root intrusions (up to 2 inches in diameter) using rotating nozzles, but dense root balls or deeply embedded roots may need mechanical cutting or pipe relining afterward. Technicians assess root density via camera inspection and select forward-jet or root-cutting nozzles accordingly.

Conclusion

Hydro jetting offers a powerful, eco-friendly, and highly effective way to eliminate tough blockages, whether caused by grease, scale, roots, or sludge, while helping prevent the residue that leads to future backups. By combining a pre-service camera inspection with expertly calibrated water pressure and specialized nozzles, hydro jetting can restore your pipes to near-original condition in under an hour and extend their lifespan far beyond what snaking or chemical treatments can achieve.

Whether you’re a homeowner tired of repeat clogs, a restaurant manager maintaining health-code compliance, or a property professional protecting aging infrastructure, hydro jetting delivers fast, long-lasting results you can trust.

If you’re ready to protect your plumbing investment and enjoy smooth-flowing pipes, schedule a Sewer camera inspection today and learn how hydro jetting can keep your system running at its best.